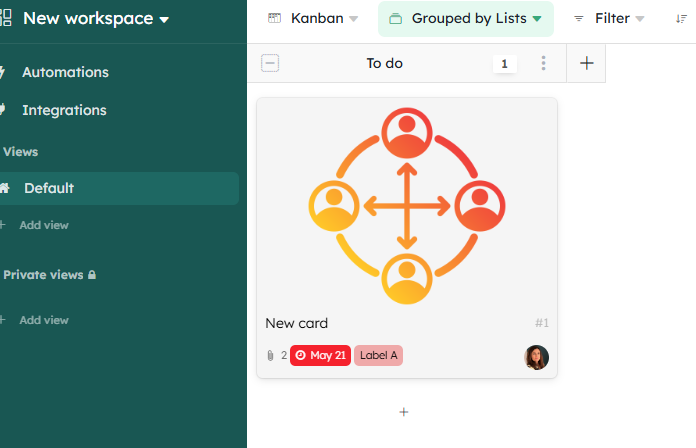
Cards are not as simple as a clever title. You can add a lot more information on you cards which helps you collaborate with your team.
Cards are the most simple items in your project and usually represent information you want to organize in your project. It can be anything that needs to get done or remembered: a task to complete, a book to read, a person to contact, a place to visit, an object to design, etc.
Create cards
First, start a project and create a group in which to add your cards. A [group](/help/guides/organize-a-project#groups) is an easy way to organize cards together. You can create as many groups as you want, and as many [types of group (or “project context”)](see https://kantree.io/help/guides/organize-a-project#customizing-groups) as needed
- click the
+sign at the bottom of a column - type the card title
- press
enterto save it.
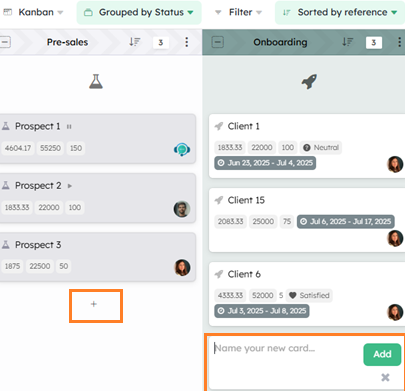
The card will show as a tile in the group, and appear instantly on the screen of your collaborators connected to the project.
Press <code>ctrl + enter</code> to open the card directly after creating it.
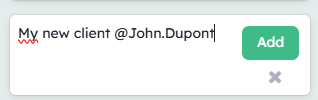
When you are creating a card, add <code>@username</code> in its title and you will automatically assign it, add <code>#group</code> and your card will be added to any groups. You can add multiple <code>@username</code> and <code>#group</code>.
Let external people create cards by using Forms
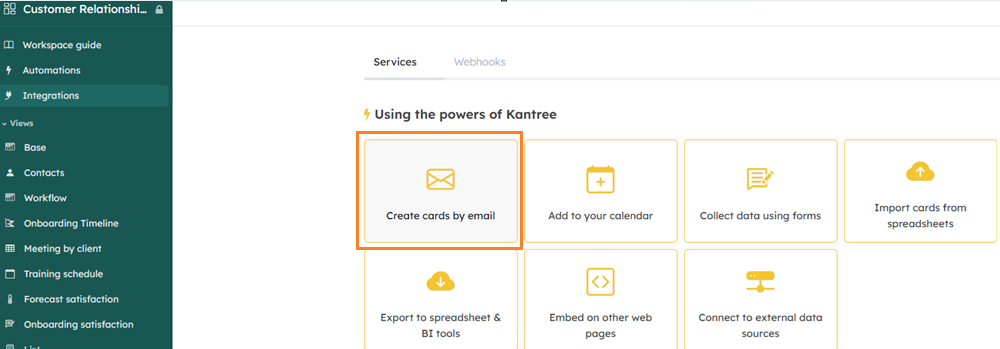
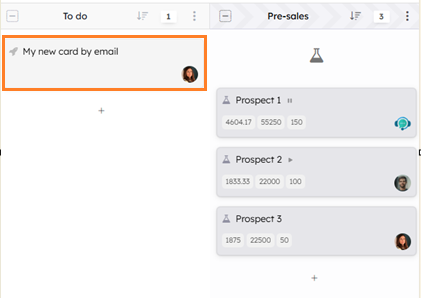
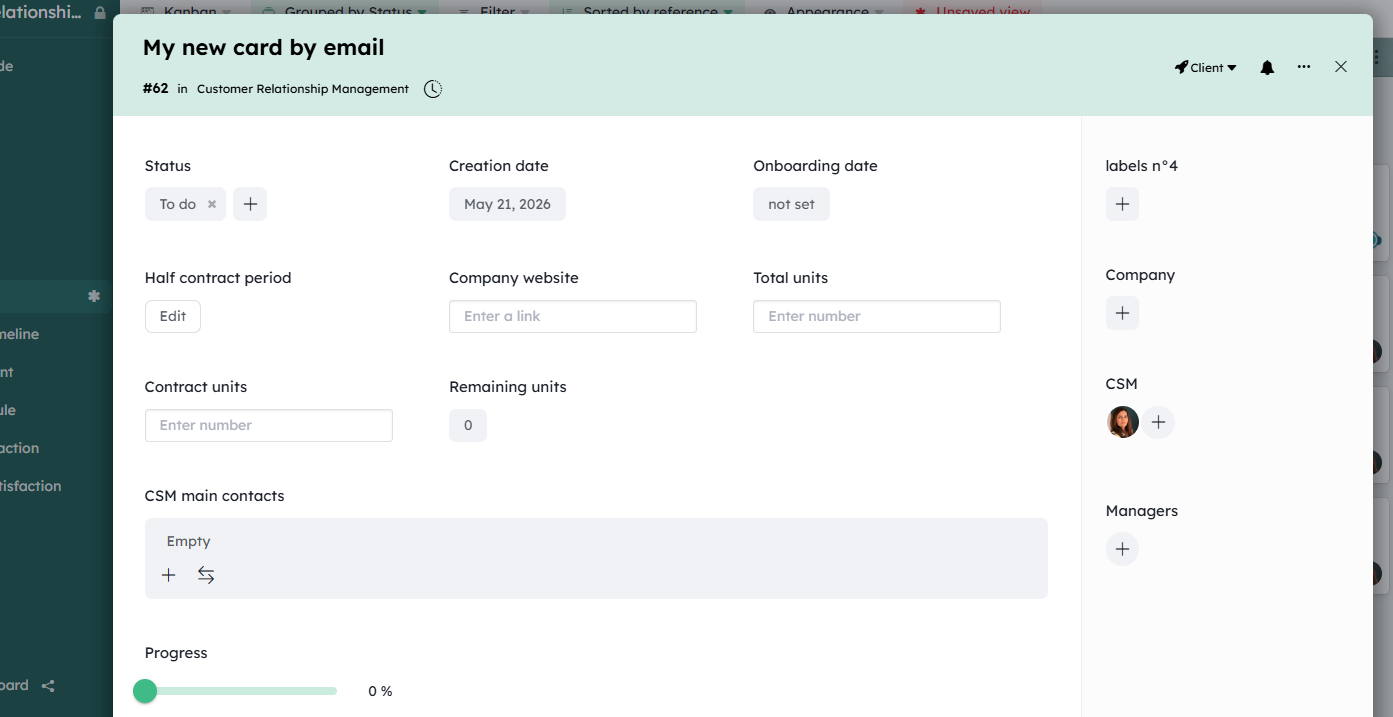
Create cards by email
Send emails to a project and it will automatically create cards. Get the project email address in the project menu then in the “Integrations” tab.
Your email subject will provide the card title, and your email content will be added as a comment to your card.
You can also use @username and #group in your email subject to directly assign your card to any member of the project and to add your card in any groups.
Forwarding (Fwd) emails is also supported.
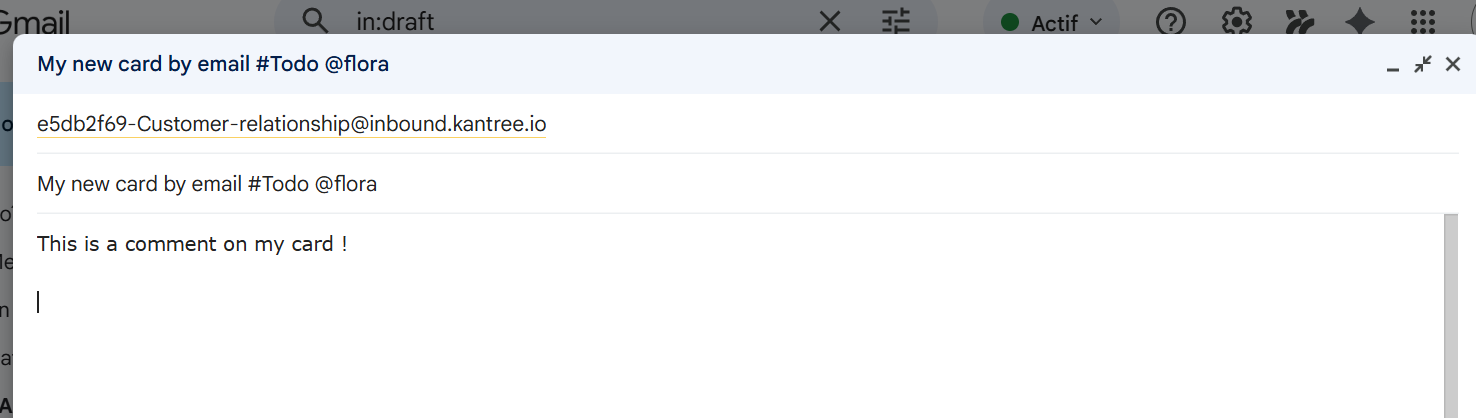
Markdown syntax is accepted to format your comment.
You can mention people in your comment so that they will be notified.
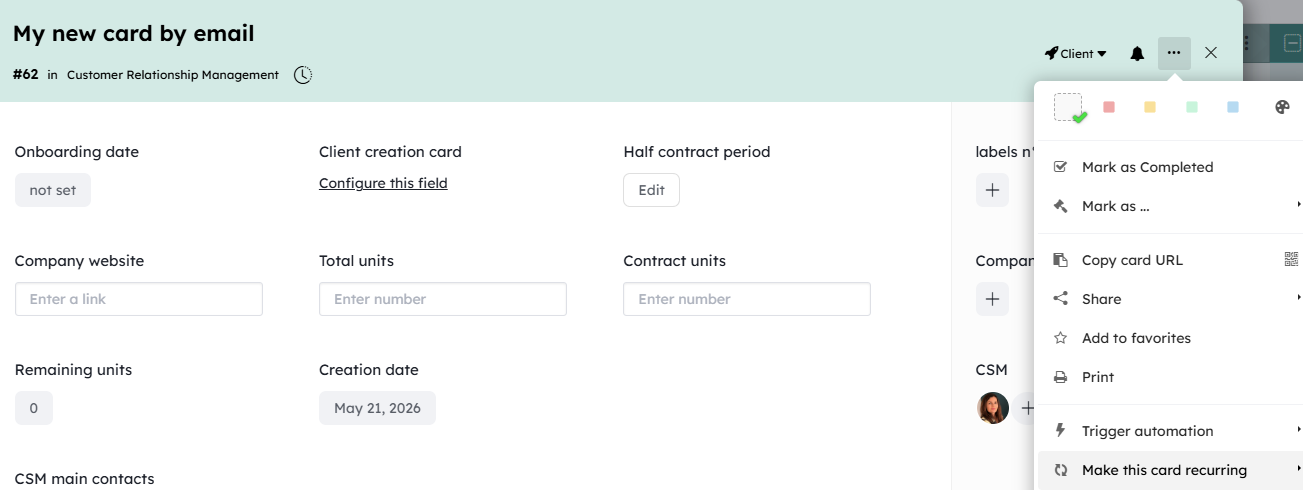
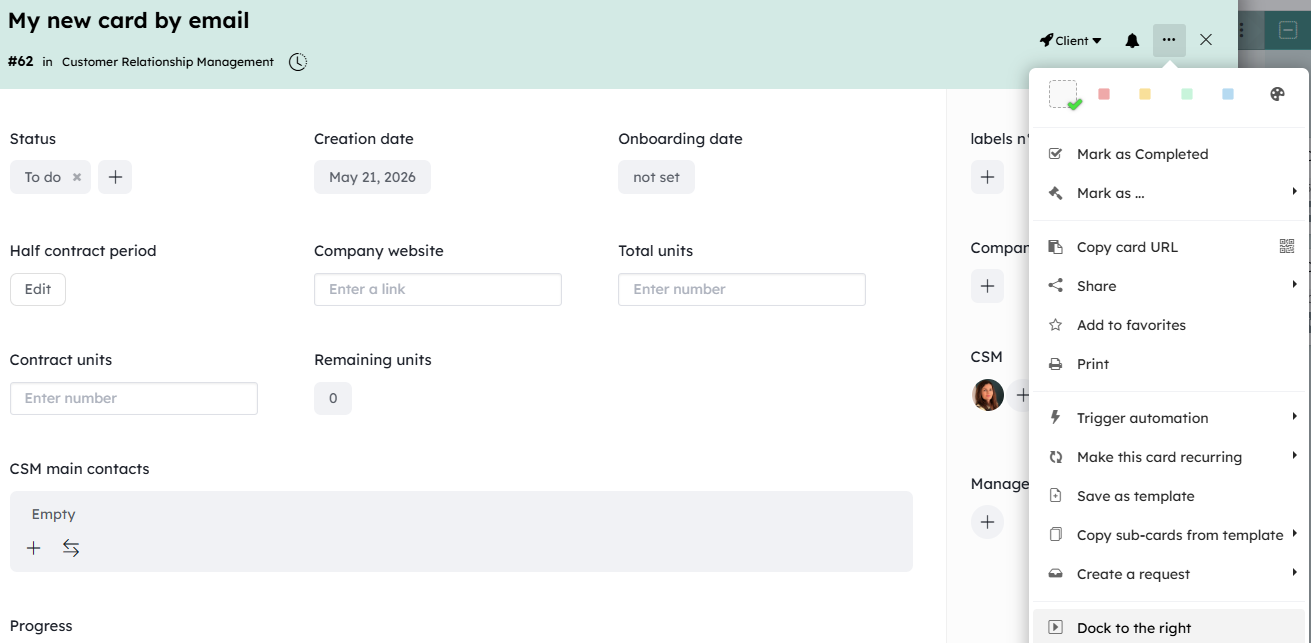
Manage recurring cards
Choose or create a card that you want to repeat. In your card menu, choose “Make this card recurring”
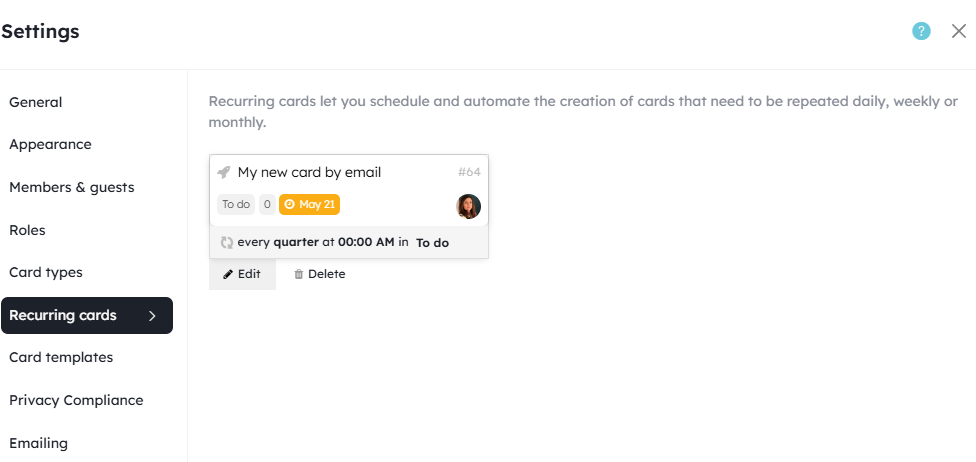
Choose between daily, weekly or monthly, select a time and the groups in which the new cards will be created.
Click Save and your recurring card will be created, by copying the card, all fields (except members) and all subcards
If you want to edit your recurring cards (edit the fields, change the creation schedule), you can do it in the left side panel, in the workspace Settings.Recurring cards are different from their original cards, so you can archive or delete the latter, this will not affect your planned cards generation
Open the card
Just click on a card to access its content: this is the card view.
You can open it as a window…
… or as a docked panel.
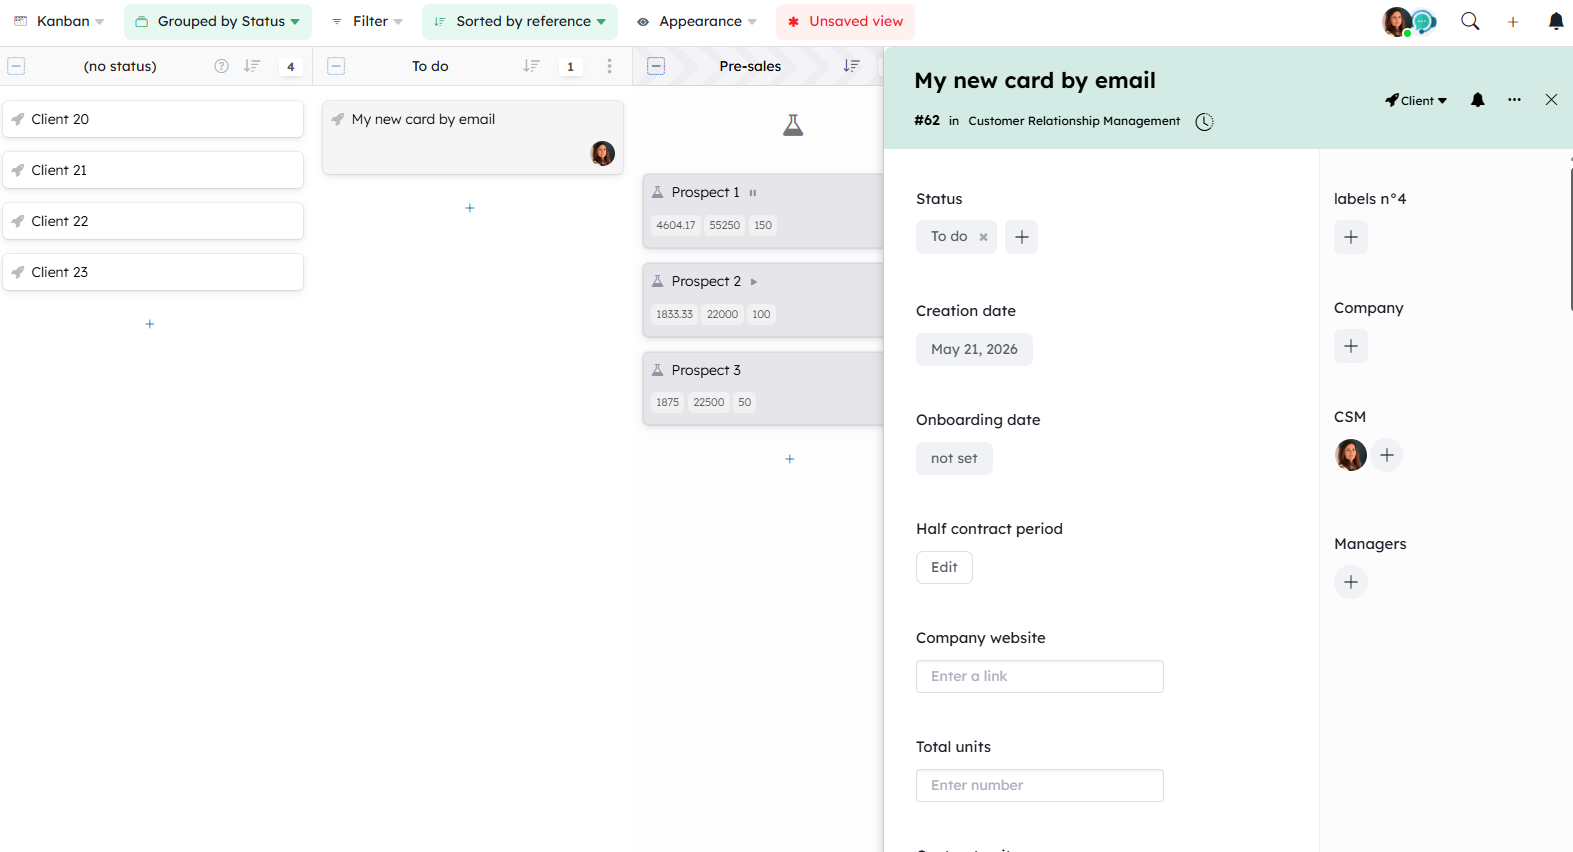
Switch between the two by clicking this button:
By default, the card includes:
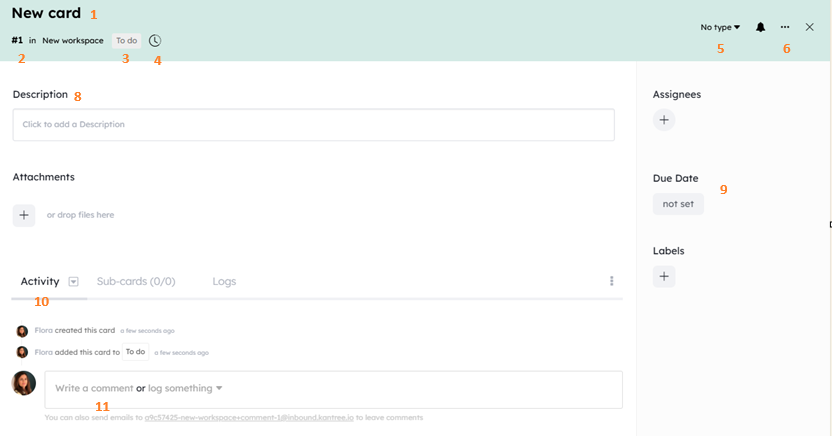
- Title: the name of your card
- Reference of the card: this reference is unique in the project (linkable in comments)
- [Groups](/help/guides/editing-cards#add-card-to-groups): the groups which the card belongs to
- History: how much time the card has been in a group, with author and duration (see how to [add cards to groups](/help/guides/editing-cards#add-card-to-groups))
- Card current model: a [card model](/help/guides/customize-cards#card-models) is a saved card structure which define what fields your card can have or which color your card has
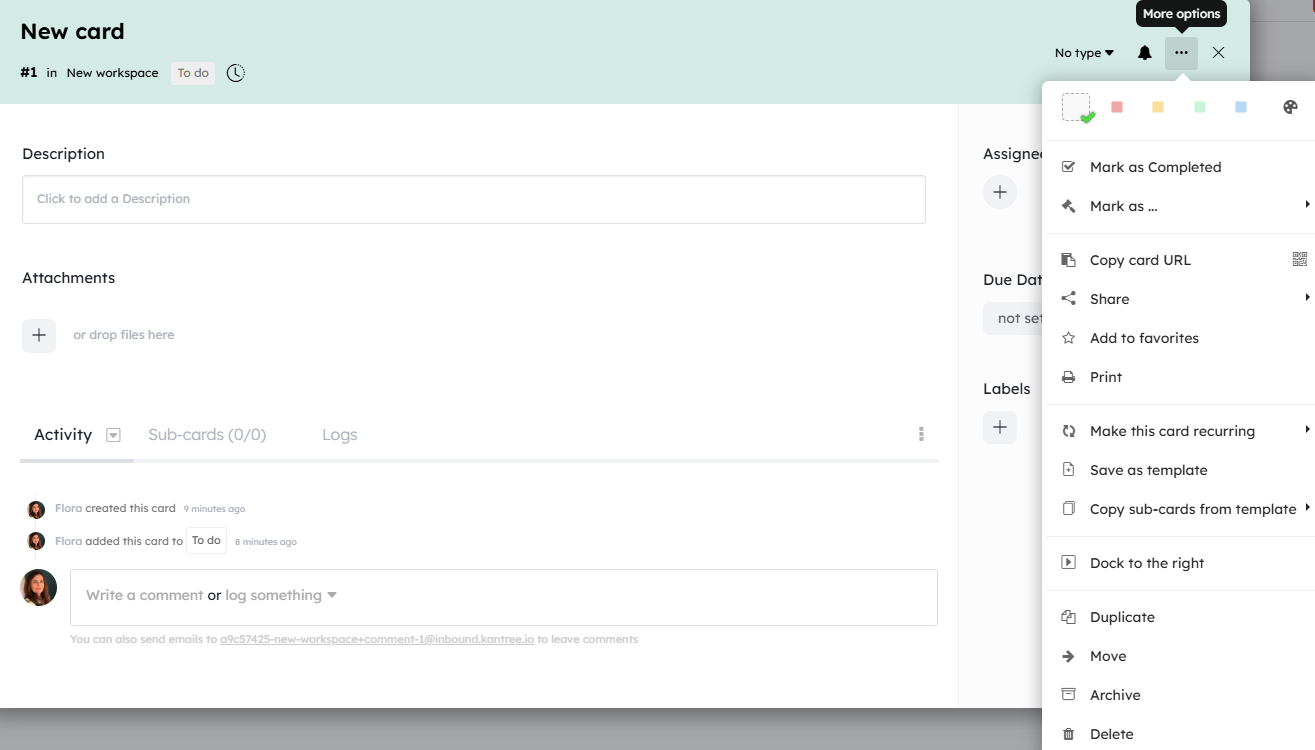
- [Card action menu](/help/guides/editing-cards#use-the-action-menu): Archive, Copy, Move, Delete and more
- [Sub-board](/help/guides/organize-a-project#hierarchy): sub-level of the card to organize its sub-cards
- Description: this is an [field of your card](/help/guides/customize-cards#card-fields-overview) that let you add some text content to it, like describing an idea or how to reproduce a bug
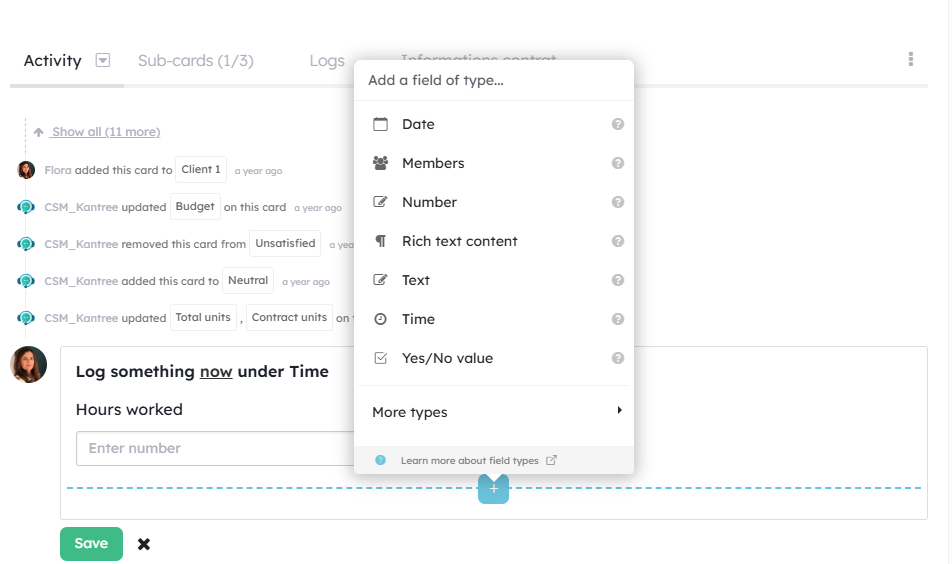
- [Fields](/help/guides/editing-cards#edit-fields): any type of information for the card. Kantree comes with built-in fields, but you can add your own
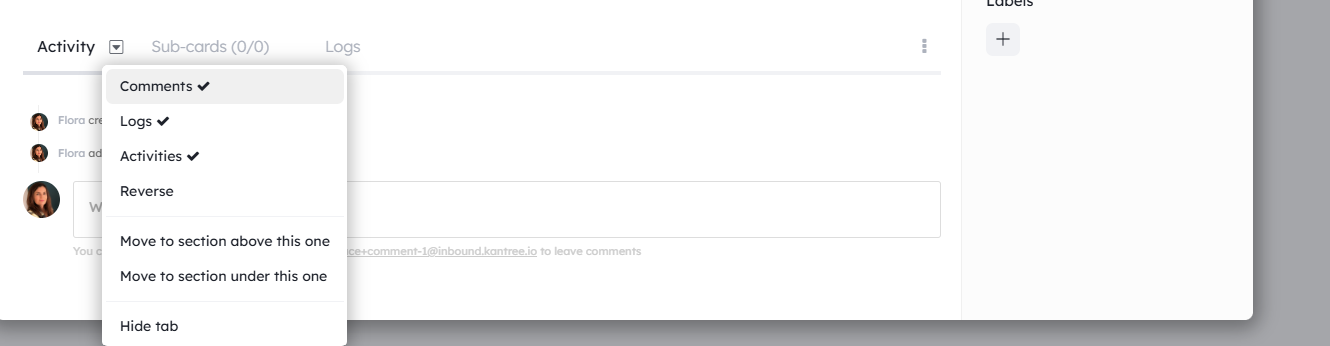
- Activity: list of all the comments, logs and changes made to the card. You can add new comments or logs data
- Comment: add a comment to the card, with [@mention](/help/guides/collaboration#comment-cards)
- [Sub-cards](/help/guides/editing-cards#add-a-checklist): sub-cards of the card, which can be managed in this checklist or in the sub-level board
-
Add Field button (project admin only): let you add field to the current card model. If the card has no model, the field will be added to the default fields set available for every card in this project (learn more in the [customize card guide](/help/guides/customize-cards))
You can filter your activity stream. The filter will be set for all cards in the project. You can also reverse the stream flow.
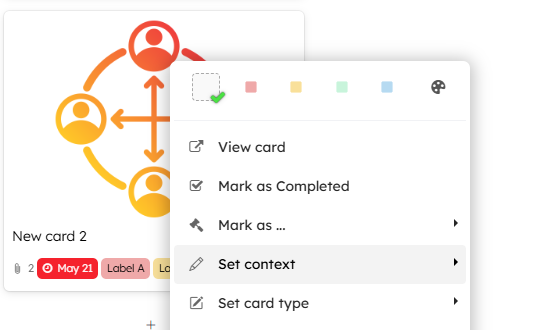
Open the contextual menu
You can act on a card through the contextual menu: right-click a the card tile to access this menu.
Edit the title
You can edit the name of a card by clicking the title in the card view.

State of cards
All Cards have an inner state.
This inner states are used to calculate analytics on your projects (see the Reporting guide https://kantree.io/help/guides/analytics)
By default, a new card is in undecided state.
An icon appears on the card tile to indicate the current state of the card. You can select between:
- dropped
- accepted
- in progress
- waiting
- completed
- closed
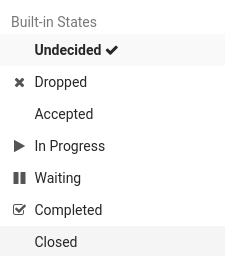
The state can be modified from:
- the contextual menu (right click on a tile in the kanban board)
- the card action menu
- move the card [in a group with specific settings](/help/guides/organize-a-project#group-options)
In addition to these states, you can switch to a group that has been previously linked to a state. This kind of groups will appear in the state list.
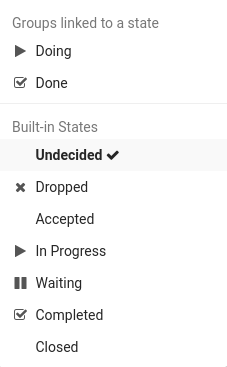
Assign a state to a group. When a card is dropped, its state will be automatically changed. You can define this behaviour in the group settings.
</div>
Note that you can mark cards as completed from the sub-cards tab.
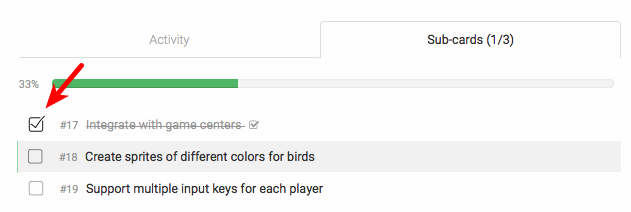
Completed cards appear strikedthrough.
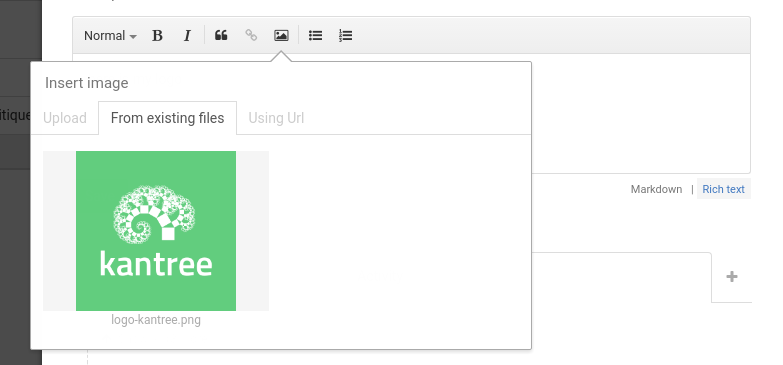
Describe your cards with formatted texts
You can add formatted text to your cards. By default, cards have a Description field.
Kantree provide you a rich text editor so that you can enhanced your text.
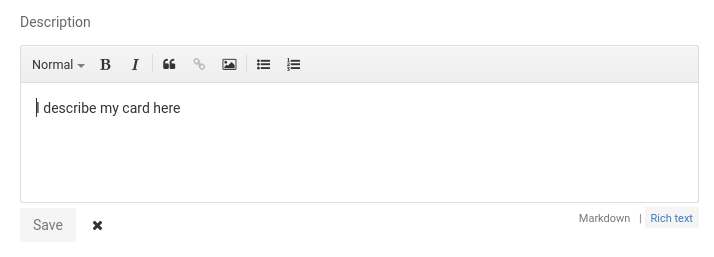
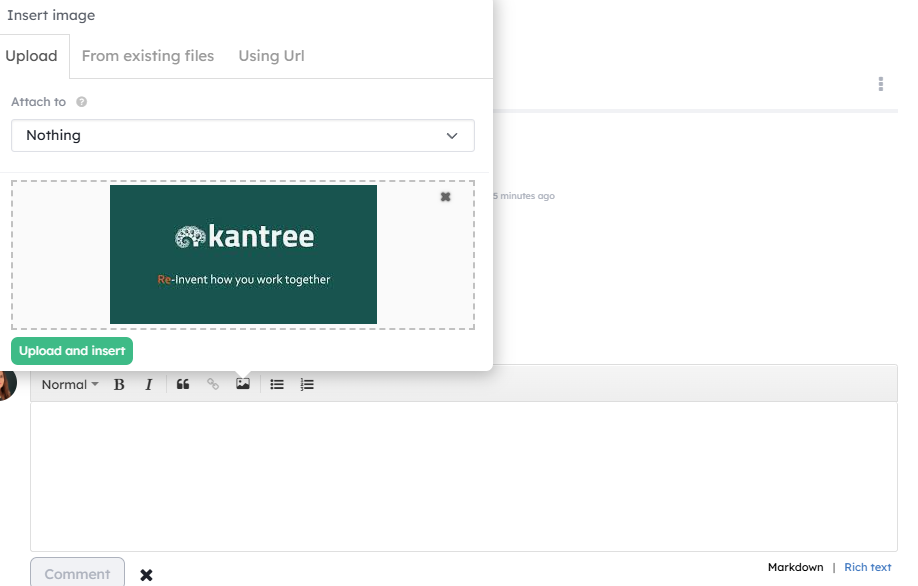
Kantree provide you a lots of options: multiple types of title, quote, bold, italic, lists, links and image.
The image selector is pretty straightfoward and let you store images in your [file fields](/help/guides/editing-cards#attach-files).
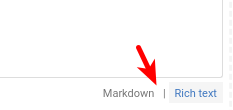
If you don’t want to use the rich text editor there is a also simple markdown editor.
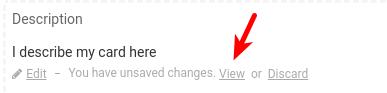
If you close your editor before you have saved your text, we got you covered by creating a temporary save and you can start your text where you left it.
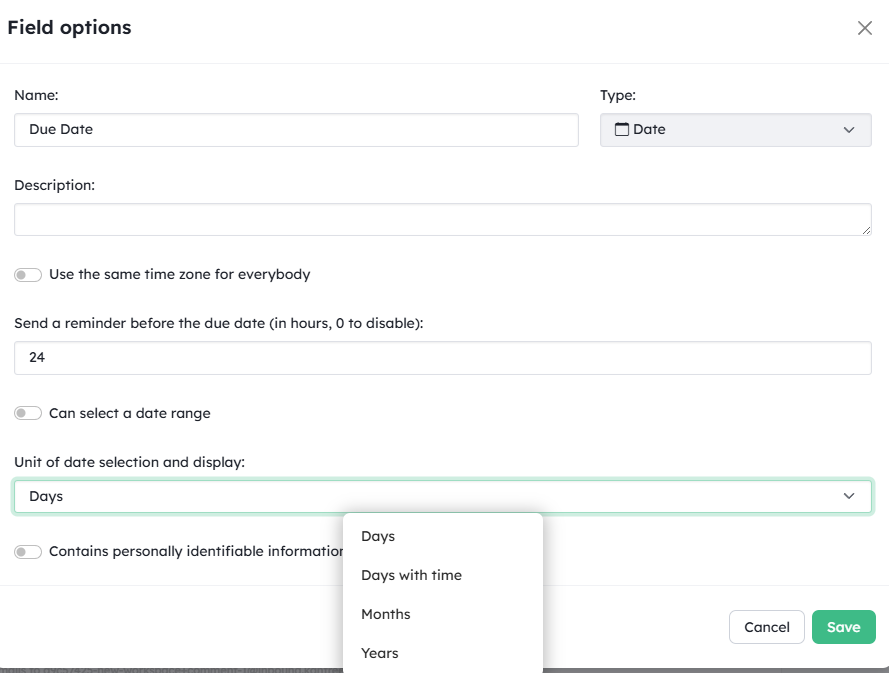
Cards and dates
Cards do not have directly associated editable dates.
They have a hidden end date that is set when the card’s status is indicated as done or closed.
This hidden date is used in certain charts in the Reporting tool (Dashboard View).
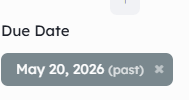
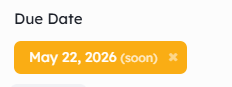
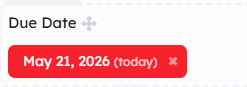
By default, cards have a date-type field to quickly configure deadlines. This Date field will allow you to use Calendar, Timeline, and Gantt views. See the guide Use timelines https://kantree.io/help/guides/timeline
This date appears on card thumbnails and its color changes over time (gray, yellow, red).
✨New 2026✨
Customize the date field using its options
Attach files
To attach a file to a card, click the + sign in the file field, or drag and drop the files in the indicated zone. You can attach multiple files at once, or add a URL.
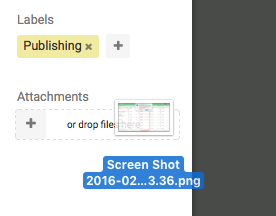
Once uploaded, your files will appear as a thumbnail, which you can click to access to file. Images can be previewed in a gallery.
Images of yours files fields can be use in your description and comments to illustrate them.
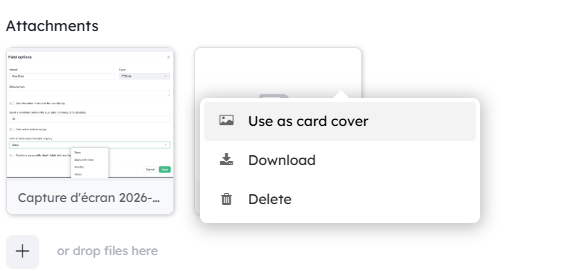
Remove an attach file by clicking the cross button in the top right corner of the thumbnail.
Select cover image
Click the small image icon in the top-right corner of the thumbnail to use this image as cover for the card tile.
Paste image from clipboard
Copy an image in your clipboard like with any screenshot tool, and then go back to Kantree and press Ctrl + V (or Cmd + V) while a card is opened (it doesn’t work anywhere else). A popup should appear asking you where you want to paste your image.
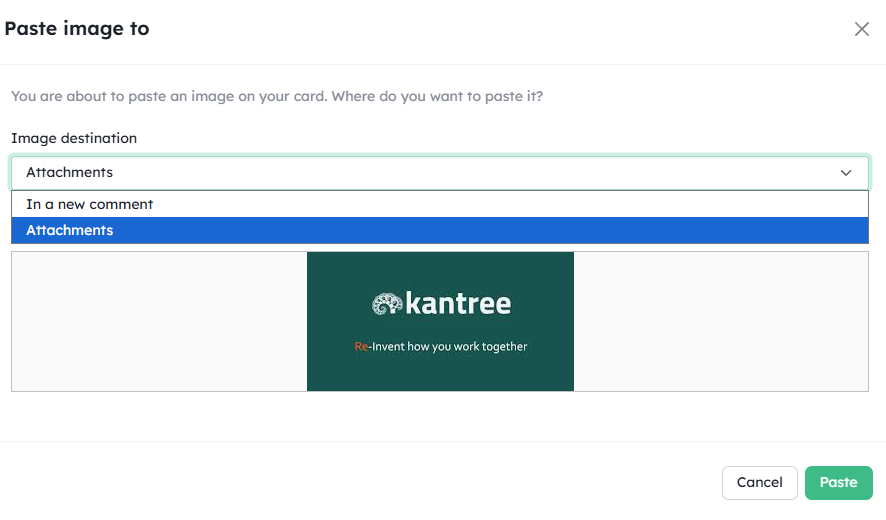
If you do it with the comment editor opened, it will automatically open its Insert Image menu.
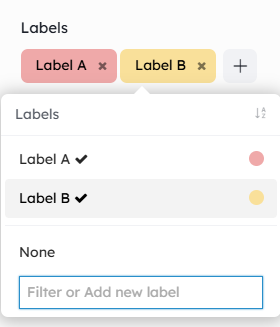
Add card to groups
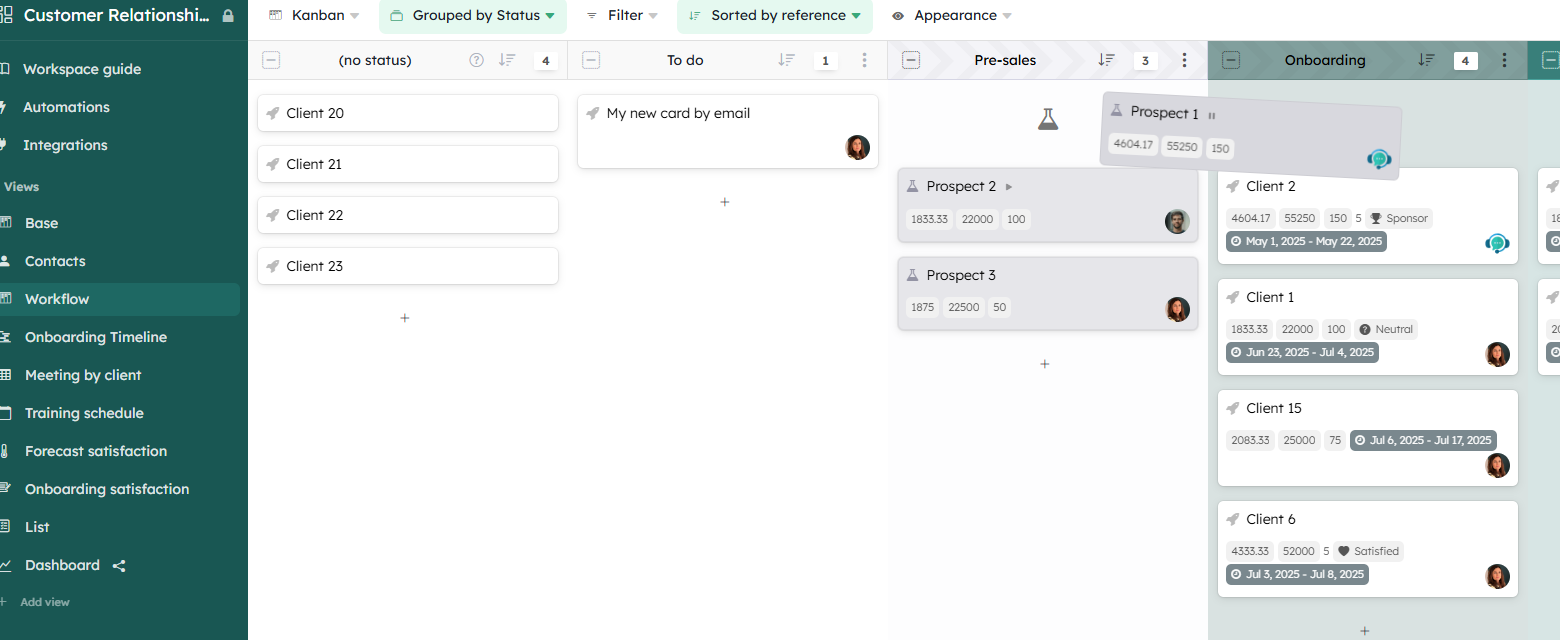
In Kantree, the cards of a projects are organized by groups.
Groups can either come from [project context] see https://kantree.io/help/guides/organize-a-project
New project are created with three default types of group: Lists``` coming from contexts andLabels` coming from fields.
You can create your own project contexts and group fields to manage your cards in more dimensions, such as epics, components, versions, teams, etc.
You can add a card to any group:
- [by drag and drop cards] with the
group byyou want
- via the header of the card modal
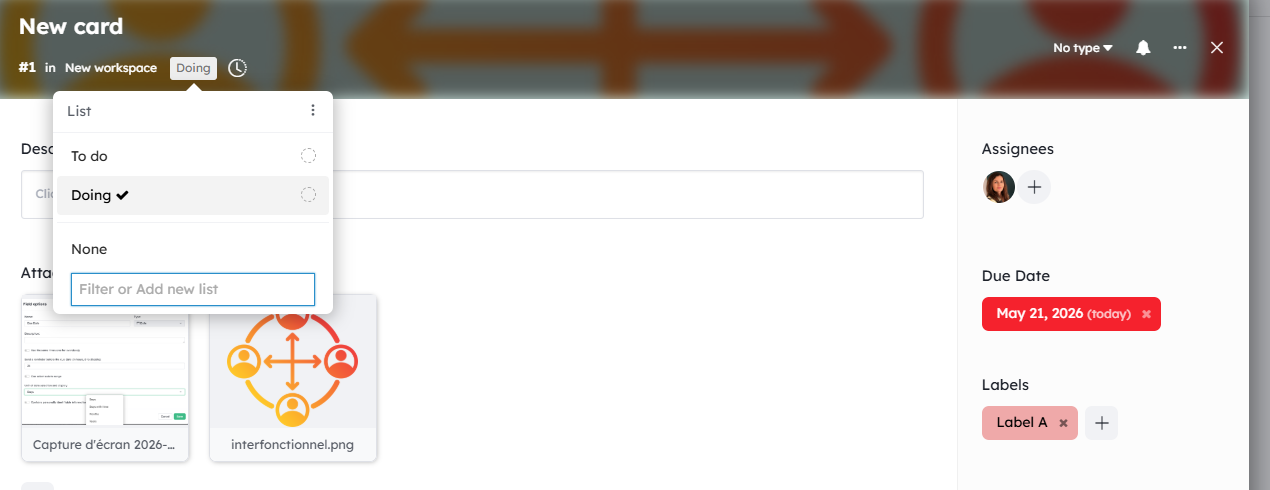
- via the group fields
- via the action and contextual menus
This groups are used in some [analytics charts of the Reporting tool](/help/guides/analytics).
Assign members
The fields Assignees let you assign members of the project to the card. This also [subscribe](/help/guides/collaboration#subscribe-to-cards-and-notifications) this member to the card. He is notified of any change on the card.
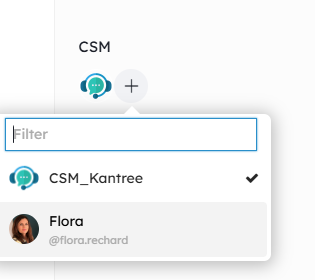
You can add more member fields to specify different assignments (Like Reviewer, Testeur, Writer, Developer, Designer….).
Edit other fields
There is a lot more types of field available for your card. You can have a list of them in the [customize card guide](/help/guides/customize-cards#types-of-fields).
Add relation between cards
Card and Card relationship field let you bind cards between each other. You will find more on this in the guide [“Organize your projects”](https://kantree.io/help/guides/customize-cards#card-relations).
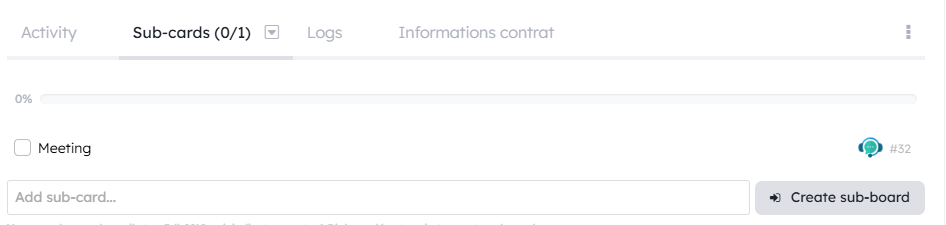
Add sub-cards
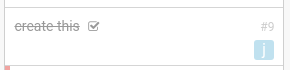
Add sub-cards to a card from the sub-cards tab. A sub-card is itself a card!
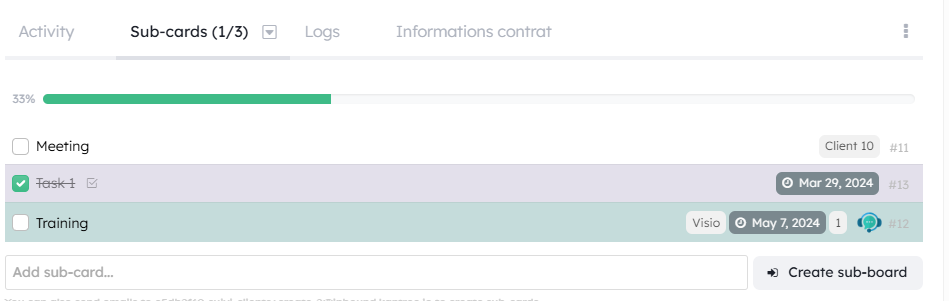
From this list, sub-cards can be renamed, mark as completed or opened as a card.
You can display your sub-cards right in your Kanban. Just click on the number of sub-cards button. Check the option in Appearance menu.

In basic mode only 3 sub-cards are displayed. You can expand the list to display all the sub-cards.
You can keep displaying sub-cards of sub-cards going down to the bottom of your project’s card hierarchy.
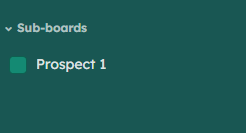
Create a sub-level
You can attach a sub-board to a card simply by clicking the Create a sub-board button in the card header.
This create a new level in the hierarchy of your project. You can create as many levels as you want.
In your sub-board, you have access to all the project tools (contexts, filters, tools, saved views…). You can move your sub-cards in the kanban board.
Get a recap of all the sub-boards of a project in the “Sub boards” section in the sidebar:
\ You can pin a (sub) board to access it directly from your dashboard without navigating the hierarchy of cards. Simply click the bookmark button in the card settings menu in its detailed view. The board will then appear both on your dashboard and in the navigation menu.
</div>
Add logs
In your card, you can log any kind of structured information. The most obvious application of this feature is time tracking.
Learn more in the [Logs guide](https://kantree.io/help/guides/logs).
Copy or move cards
[Copy or move](/help/guides/organize-a-project#movecopy-cards) the card somewhere else in the current project, or to a different project and team.
Share a card
-
URL Link card / QR Code
You can share a map via the URL or the QR code of the map by clicking on the “…” then “copy the URL”. The card will be accessible to people who are members of the workspace.
-
Share a card with an unlicensed user
- URL Link /QR Code
You can share a card even to someone who does not have a Kantree license. In this case, the card will be read-only. To do this, click on “Share”
You can save the QR Code or print it with (ctrl + P)

Customize cards
Go to the [customize cards guide](https://kantree.io/help/guides/customize-cards) to learn how you can leverage Kantree features to better visualize the difference between your cards.