
Getting started
An introduction to Kantree covering how to create and manage your first workspace
In this article
Welcome to Kantree! This guide shows you the main ideas of the app, from your first workspace to your daily work with your team.
What is Kantree?
Kantree helps you organize work, alone or with a team:
- Workspaces keep your work as cards: tasks, contacts, requests, ideas…
- Views show the same cards in different ways: a board, a table, a calendar, a Gantt chart…
- Templates give you a ready-made workspace for common uses. You can also start from scratch.
- Forms let people outside your workspace send you information. Each answer becomes a card.
- Automations do repetitive work for you, for example when a card changes.
- Dashboards show charts and numbers about your work.
- My work collects everything that concerns you, from all your workspaces.
Log in
Go to https://kantree.io (or to the address of your company’s Kantree).
Ways to log in
- With your email address and password.
- With a Google or Microsoft account.
- With the single sign-on (SSO) of your company, if your administrator set it up.
To use Kantree on your phone or tablet, install the app:
Protect your account with two-factor authentication: open Account settings, then Security. See your account.
Kantree also works with the tools you use every day, such as Slack and Microsoft Teams. See Integrations.
Choose your language
Kantree is available in English, French, German, Spanish, Italian and Portuguese. Each person chooses their own language.
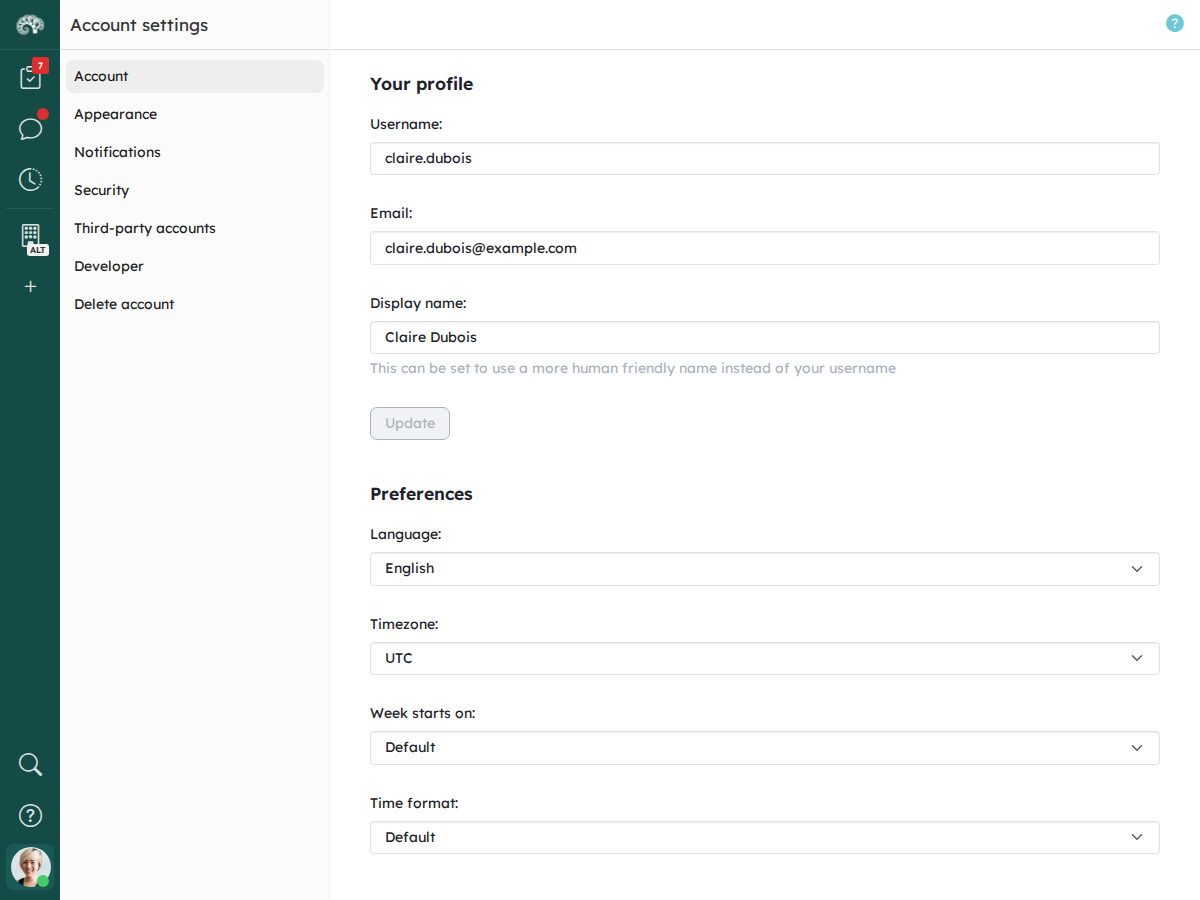
- Click your picture at the bottom left of the screen, then Account settings.
- In Preferences, choose your Language.
The organization
Home page
An organization is the place where your company works in Kantree. It contains the members, the teams and the workspaces.
The home page of the organization shows your workspaces. Use the tabs to see the Workspaces, Portfolios, Teams, Forms, Documents and Members of the organization.
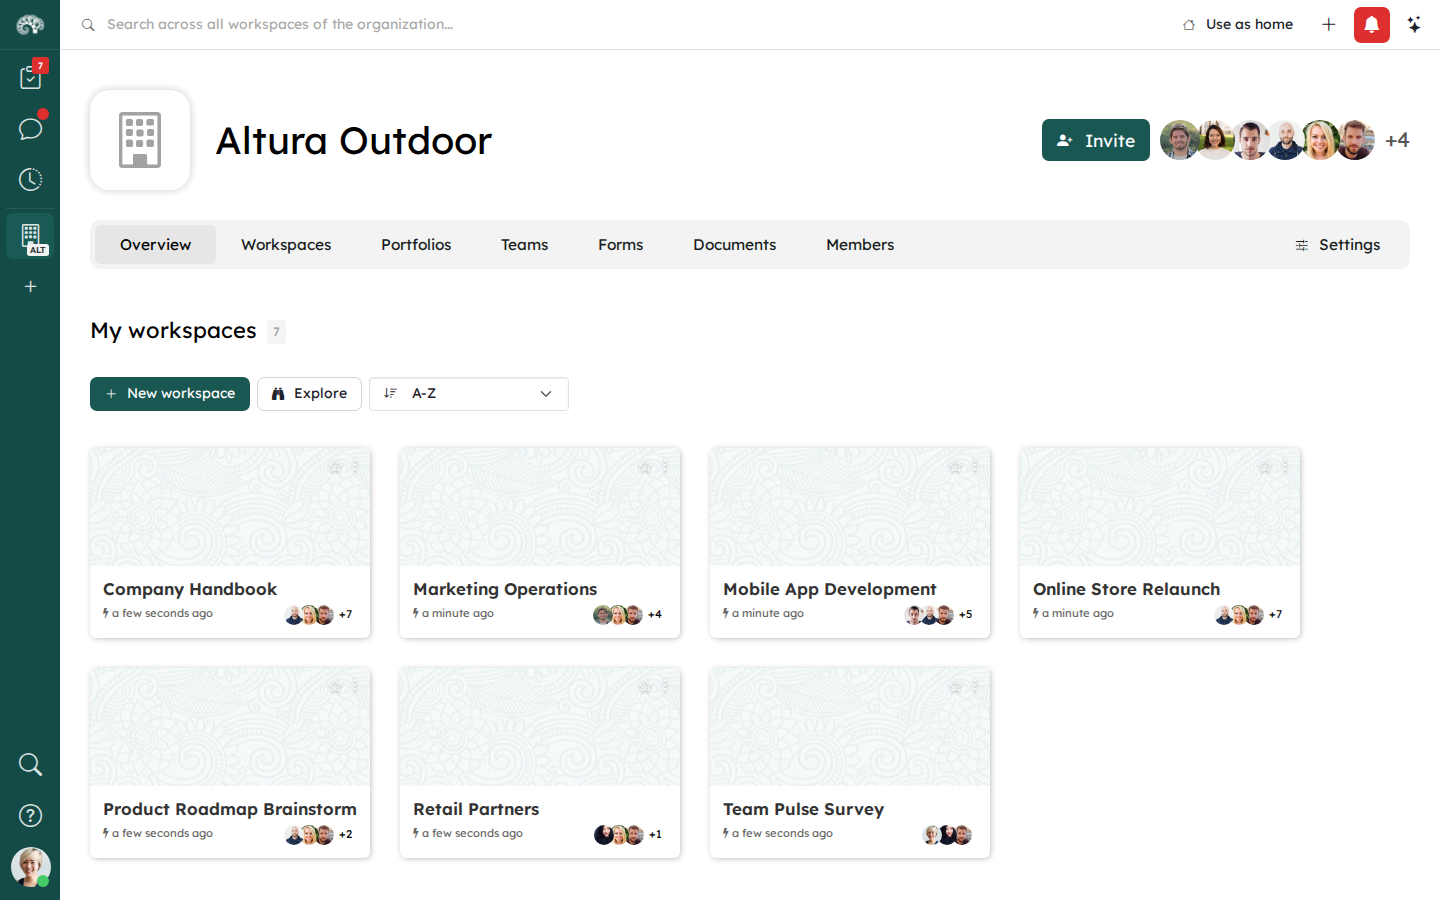
Teams group the workspaces and the members of a department or a project. Owners and administrators of the organization create them in the Teams tab, with New team.
The workspace
Tour of the screen
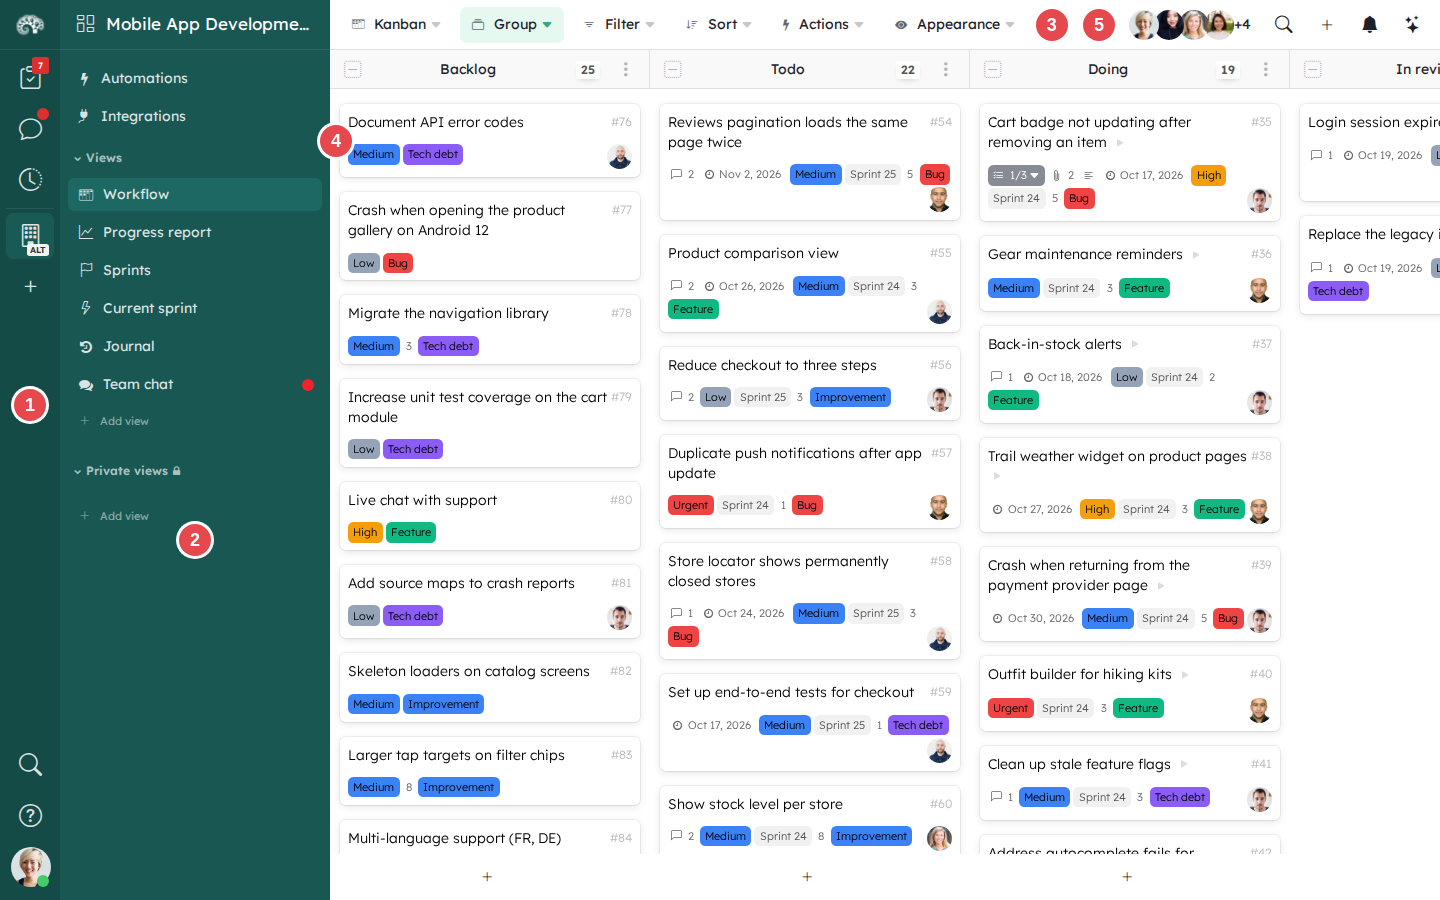
- The app sidebar is always visible. From top to bottom: My work, Discussions, your recently opened workspaces, your organizations, then the search, the help and your account.
- The workspace sidebar gives access to the views of the workspace, its automations and its integrations. Click the name of the workspace to open its menu and its settings.
- The toolbar changes how the view shows the cards: the view mode (kanban, table…), the grouping, the filter, the sort and the appearance.
- The cards. A card is one piece of work or information: a task, a bug to fix, a meeting, a customer… You can create as many cards as you want, and add the fields you need to them.
- The workspace tools: the members, the search, the + button to add cards and views, the notifications and the assistant.
Create a workspace
Before you create a workspace, think about what it will contain. Several small workspaces are often easier to read than one large workspace. You can connect their cards later with a relationship field.
Choose the location
Click New workspace on the home page of your organization or of a team. You can move the workspace to another team later, in its settings.
Choose a template
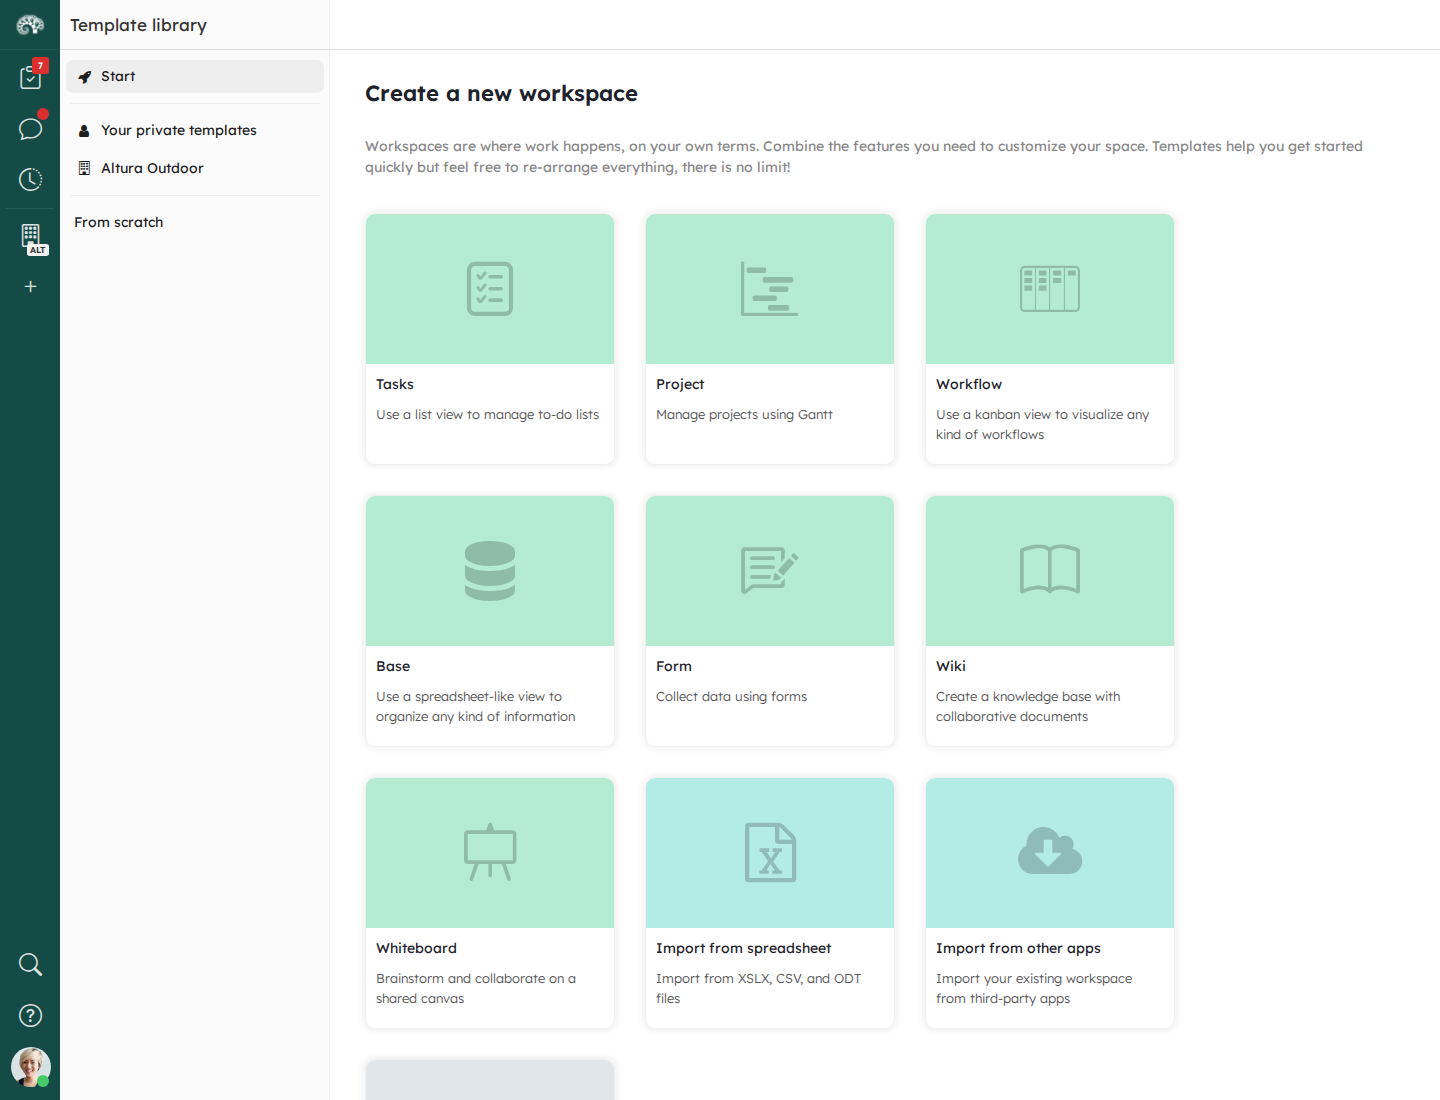
The template library opens. Choose the starting point that fits your work:
- Tasks: a to-do list.
- Project: a project plan with a Gantt chart.
- Workflow: a kanban board with steps (to do, doing, done…).
- Base: a table, like a spreadsheet, for any list of information.
- Form: a form that collects answers.
- Wiki: a knowledge base with documents.
- Whiteboard: a shared drawing board for brainstorming.
- Import from spreadsheet and Import from other apps: start from your existing data. See Integrations.
To start with nothing, click From scratch, then Empty. Your organization can also share its own templates: they are in the sidebar of the library.
If the assistant is turned on in your organization, Ask Assistant builds the workspace for you from a description of your needs.
Choose the settings
- Enter the Workspace name.
- Choose Who can see & access this workspace:
- Private: only you and the members that you invite.
- Team visible: the members of the organization or of the team can see the workspace and join it.
- Shareable: anybody with the link can see the workspace.
- Choose a color, then click Create.
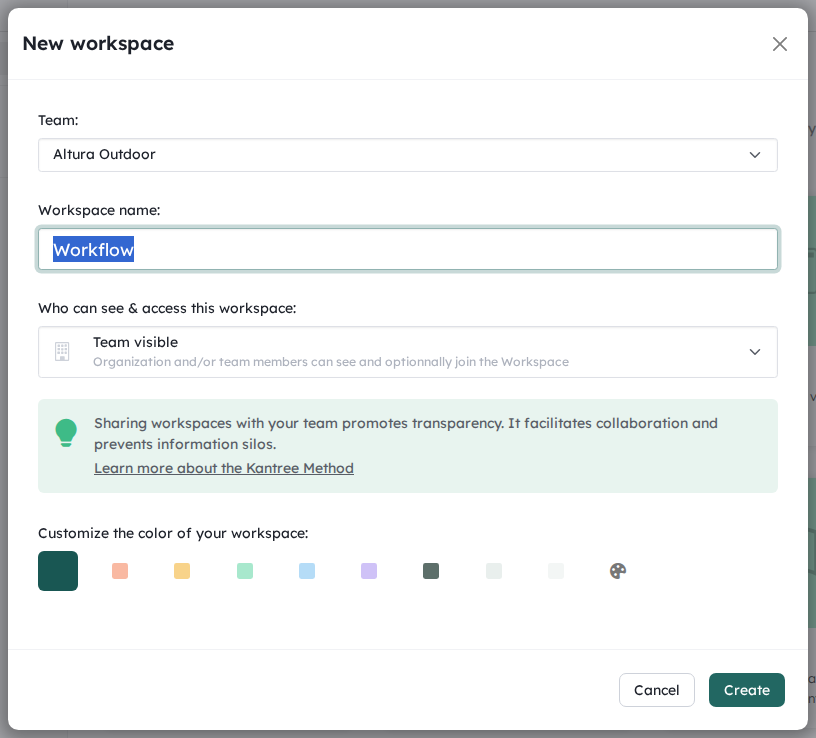
While you build your workspace, keep it Private. When it is ready, change its visibility in the settings of the workspace.
To find a workspace quickly, add it to your favorites: click the name of the workspace, then the star.
Import existing work
You can import your work from a spreadsheet, or from other tools such as Trello, Asana or GitHub. See Integrations.
Create the columns of your board
On a kanban board, the cards are in columns. The columns come from a field of the cards: for example a State field with the steps “To do”, “Doing” and “Done”, or a Labels field.
- An empty workspace has only one column, (ungrouped). To create columns, add a State or Labels field to a card (see Add fields to your cards), then click Group and choose this field.
- To add a column, scroll to the right end of the board and enter its name.
- To change the order of the columns, drag them.
See Organize a workspace to learn more about groups and fields.
Change the view mode
A kanban board is not enough for all needs. Do you have deadlines to follow? A team to plan? A long list of contacts? Kantree has a view mode for each situation.
Click the name of the view mode in the toolbar (for example Kanban), then choose another mode:
- Kanban: cards in columns.
- Table: cards in rows, like a spreadsheet.
- List: cards in a checklist.
- Calendar, Timeline and Gantt: cards on dates. The cards need a date field.
- Quadrant: cards in a matrix, for example urgent and important.
- Map: cards on a map. The cards need a Location field.
- Dependencies: cards and the links between them.
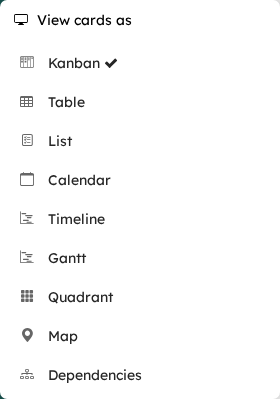
Each person can choose the view mode that suits them, on the same cards.
Add cards
Create a card
A card can be anything: a task, a contact, a contract, a customer…
- Click the + at the bottom of a column, enter the title of the card, then press Enter. The card goes into this column.
- Or click the + at the top right of the screen, then Card.
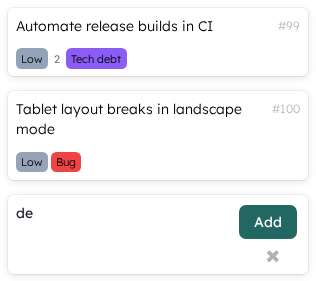
- To move a card, drag it inside a column or to another column.
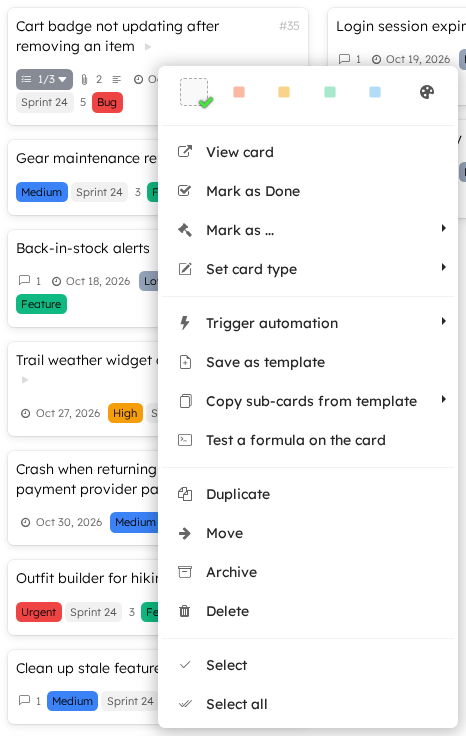
- To move a card to another workspace, right-click it, then click Move.
Open a card
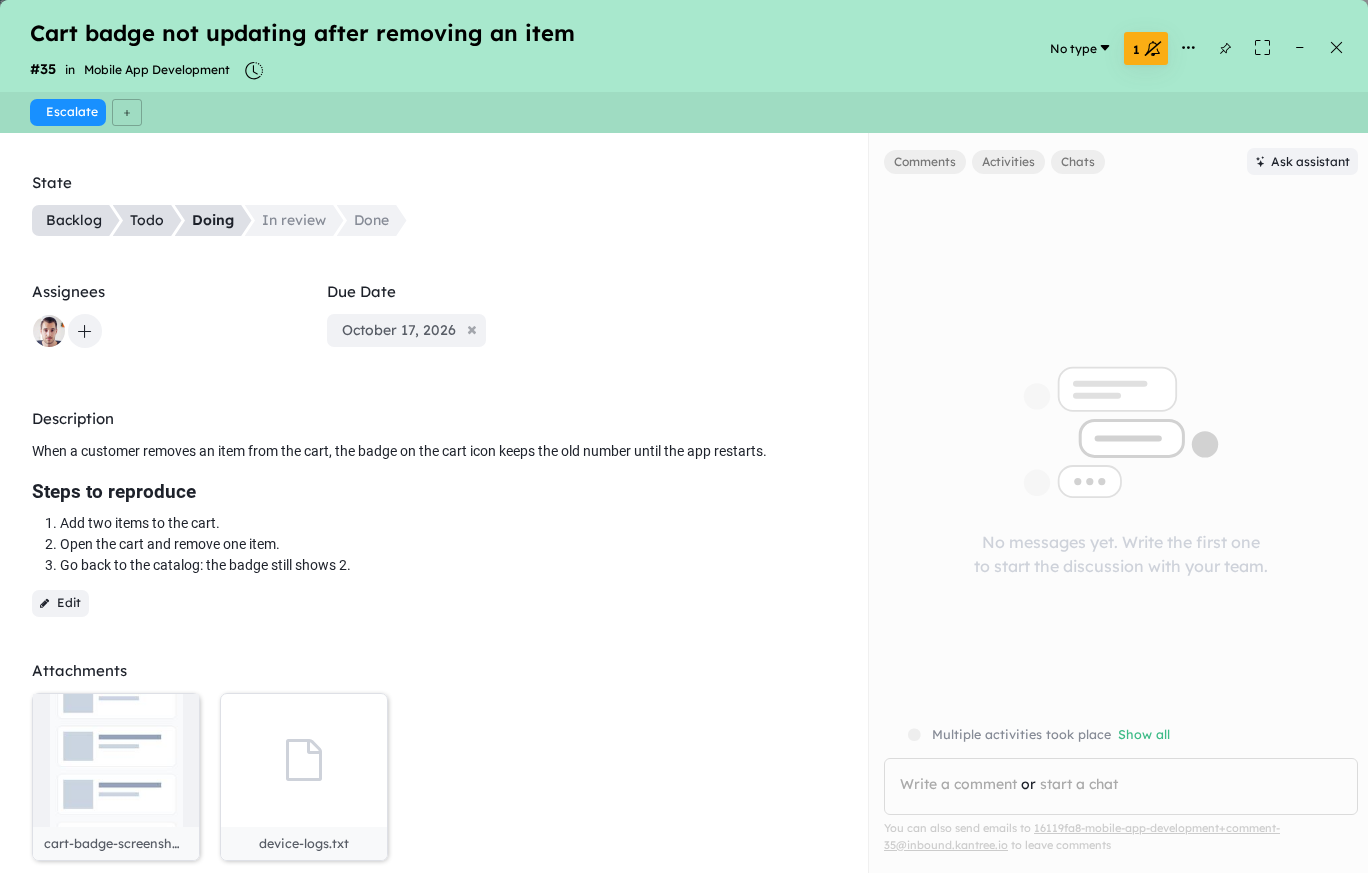
Click a card to open it. The card window shows its fields on the left, and its comments and activity on the right.
- Each card has its own address. To share it, click … at the top of the card, then Copy card URL.
- To keep the card open next to your view, click …, then Dock to the right.
Add fields to your cards
Fields hold the information of your cards: dates, assignees, numbers, files…
- To add a field, open a card and hover a field. Click the + that appears next to it, then choose the type of the new field.
- To change a field, hover it, then click the button that appears above it (for example Date field): you can rename the field, change its appearance and its options, or delete it. To move a field, drag it to another place.
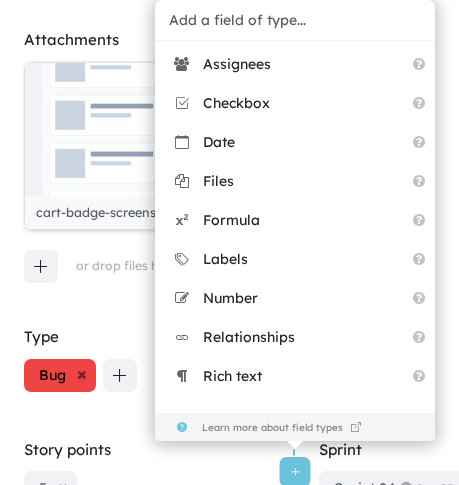
A field belongs to the workspace, not to one card. When you add, change or delete a field, all the cards of the workspace change.
See Customize cards for the list of field types.
Use card types
A workspace can have several types of cards, for example “Bug” and “Feature”. Each card type has its own fields.
To create a card type, open a card, click No type at the top of the card, then enter the name of the new type. Then add the fields of this type.
You manage the card types in the settings of the workspace, in Data model. There you can also choose the type of new cards.
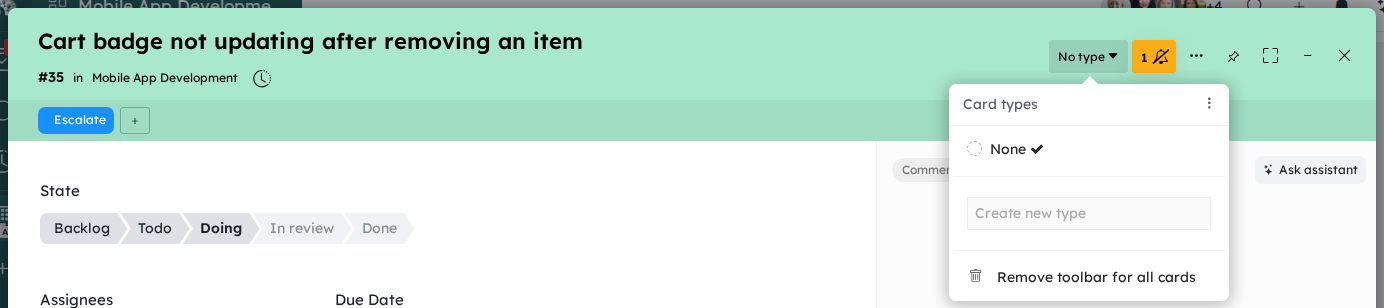
Administrators of the organization can share a card type between several workspaces.
Create views
A view is a saved way to show the cards: a view mode, a filter, a grouping and display options.
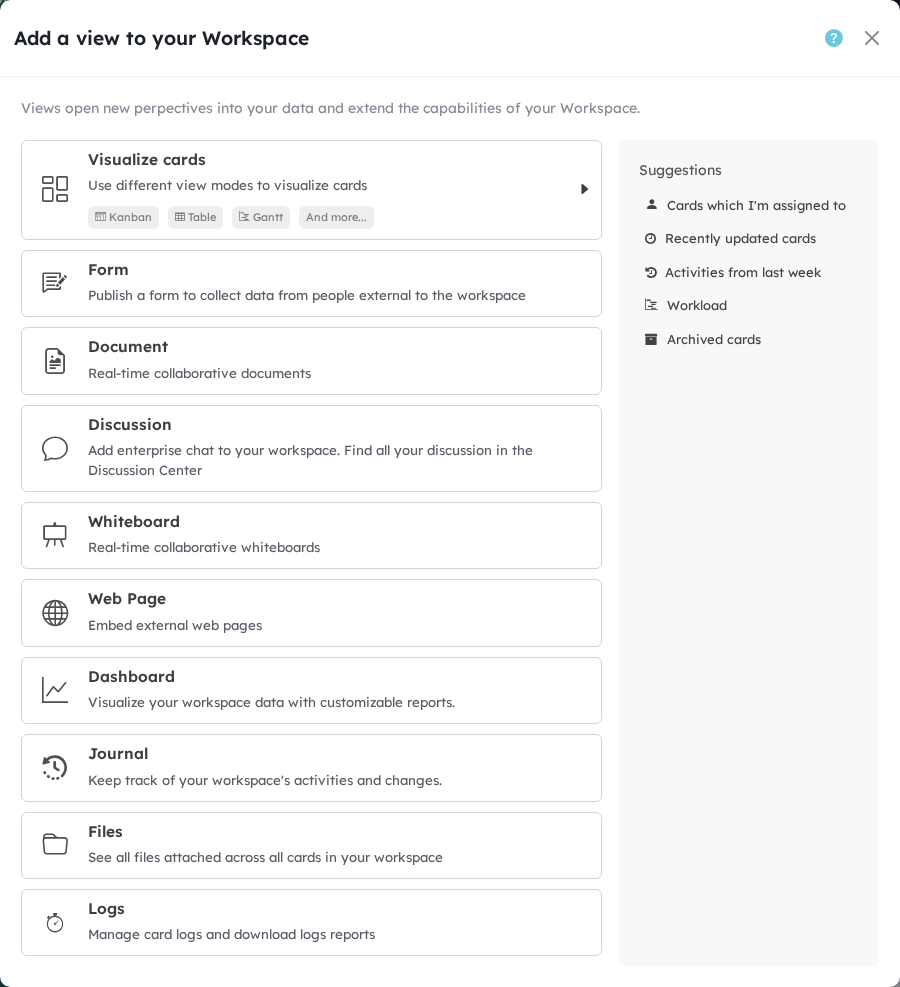
To add a view, click Add view in the workspace sidebar. Choose Visualize cards for a view of cards, or another type of view (see Other types of views).
Filter
To see only some cards, click Filter. Choose a field, then the value. For example: the cards where Assignees is you.
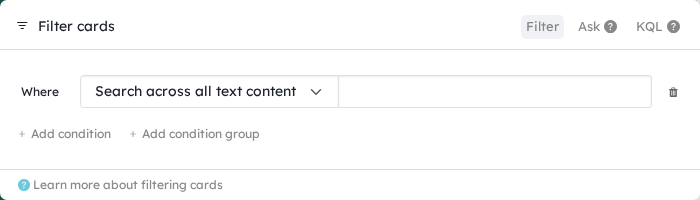
For precise filters, use the KQL mode of the filter. KQL is the query language of Kantree. See the KQL guide.
Appearance
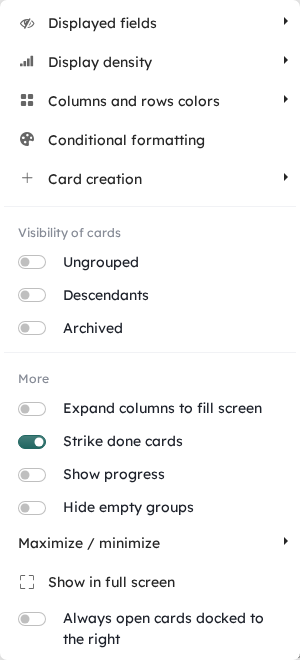
The Appearance menu changes how the view shows the cards. The options depend on the view mode. On a kanban board:
- Displayed fields: the fields shown on the cards, the card reference, the number of comments and sub-cards, the cover image.
- Display density: Normal, Compact or Large.
- Columns and rows colors: colors the columns, or the rows when you group by two fields.
- Conditional formatting: colors the cards that match a filter.
- Card creation: the fields of the card creator, and what happens after the creation.
- Visibility of cards: shows the Ungrouped cards (with no value in the grouping field), the Descendants (sub-cards) and the Archived cards.
- Expand columns to fill screen.
- Strike done cards: crosses out the titles of completed cards.
- Show progress: shows the progress of each column.
- Hide empty groups.
- Maximize / minimize: opens or closes all the columns or all the cards.
- Show in full screen: to present or print the view.
- Always open cards docked to the right.
- Actions: adds buttons that run automations to the toolbar.
Save a view
When you change a view, the change is only for you, until you save it. Save a view to:
- find your filters and your options again,
- share a useful view of the cards with your team.
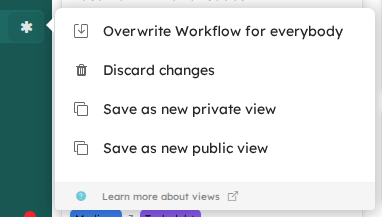
A star appears next to the view in the sidebar when it has unsaved changes. Click it, then:
- Overwrite the view (for everybody when the view is public),
- or Save as new private view (only for you) or Save as new public view (for all the members),
- or Discard changes.
Each person can change a view without changing it for the others. Everyone works with the view that suits them.
Other types of views
Add view also adds other tools to your workspace. They appear in the workspace sidebar:
- Form: collects information from people, as new cards. See Forms.
- Document: a text that you write together, in real time.
- Discussion: a chat channel for the workspace. See Collaboration.
- Whiteboard: a shared drawing board.
- Web Page: shows a web page from another site inside your workspace.
- Dashboard: charts and numbers about your cards. See Dashboards.
- Journal: the history of the changes in the workspace.
- Files: all the files attached to the cards.
- Logs: the logs added to the cards, for example the time spent. See Logs.
Create a form
A form collects information from people, inside or outside your organization. Each answer creates a card in your workspace. For example: support requests, job applications, orders.
Before you create the form, add to your cards the fields that the form will fill.
- Click Add view, then Form.
- Give the form a title and a description. They appear at the top of the form.
- Choose who can open the form.
- Add the questions: each question fills a field of the card.
- Share the link of the form.
You can answer the person who sent the form: in a comment on the card, turn on Show in request. Comments without this option stay visible only to the members of the workspace.
See the Forms guide.
Automate actions
Automations do repetitive work for you. A rule starts with a trigger (for example “a card moves to Done”), then runs actions (for example “notify the team”).
- Click Automations in the workspace sidebar.
- Click Add, then choose when the rule runs, for example When something happens.
- Choose the trigger, then add the actions.
- Click Save.
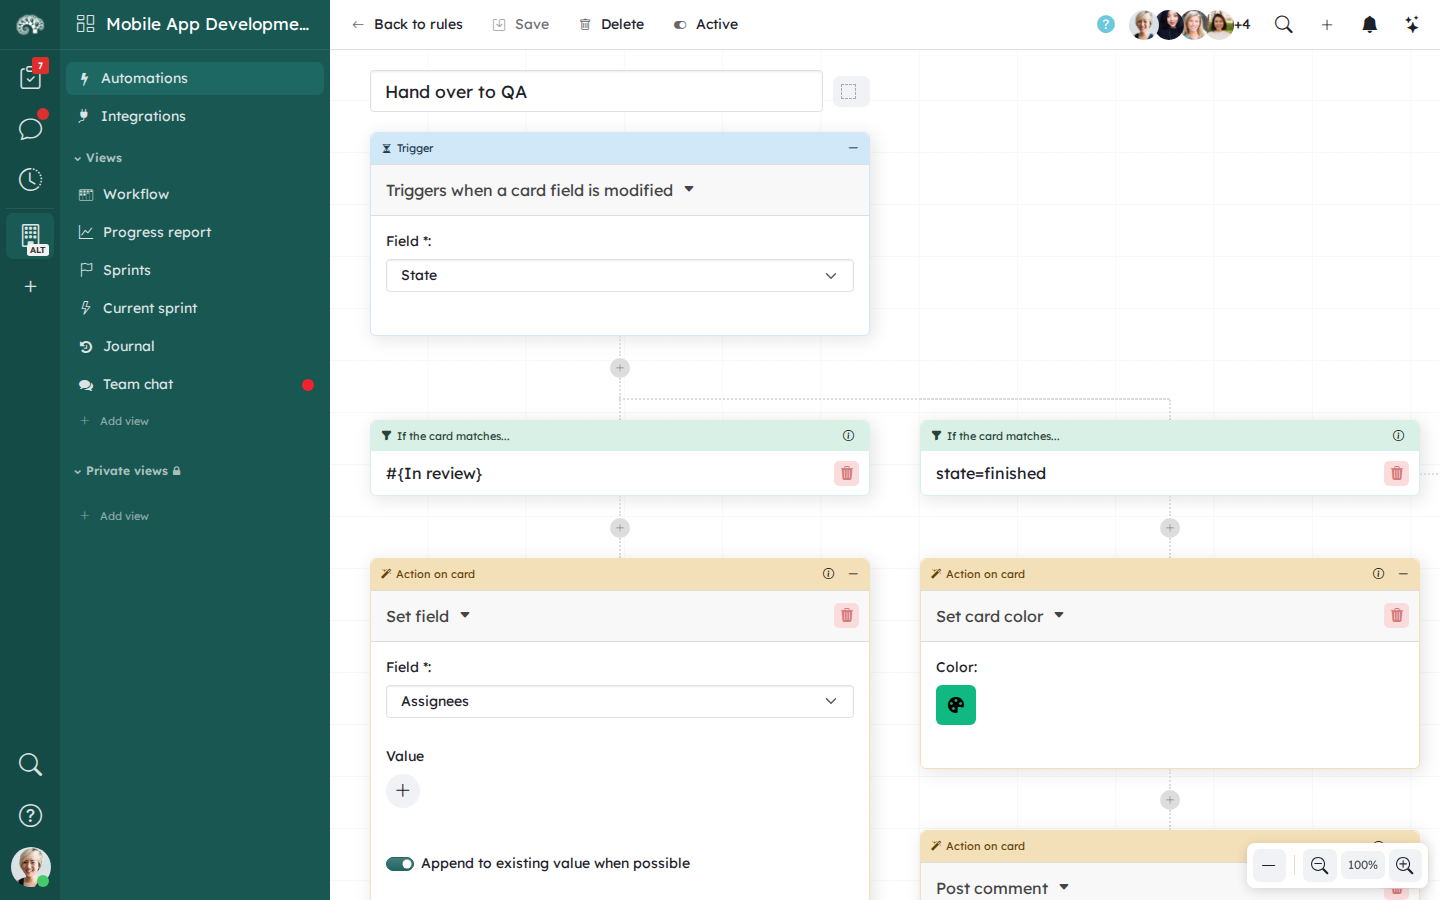
Automations can also check conditions, send emails, create cards, wait for a person to act, and run when you click a button. See the Automations guide.
If you do not need a rule for some time, turn it off instead of deleting it.
Collaborate every day
Create teams
A team groups the workspaces and the members of a department, a site or a project. It makes your organization easier to read. See Collaboration.
Invite people to a workspace
To add people to a workspace, click the pictures of the members at the top right, then Manage Workspace members. Click Add members, then choose a role for each person.
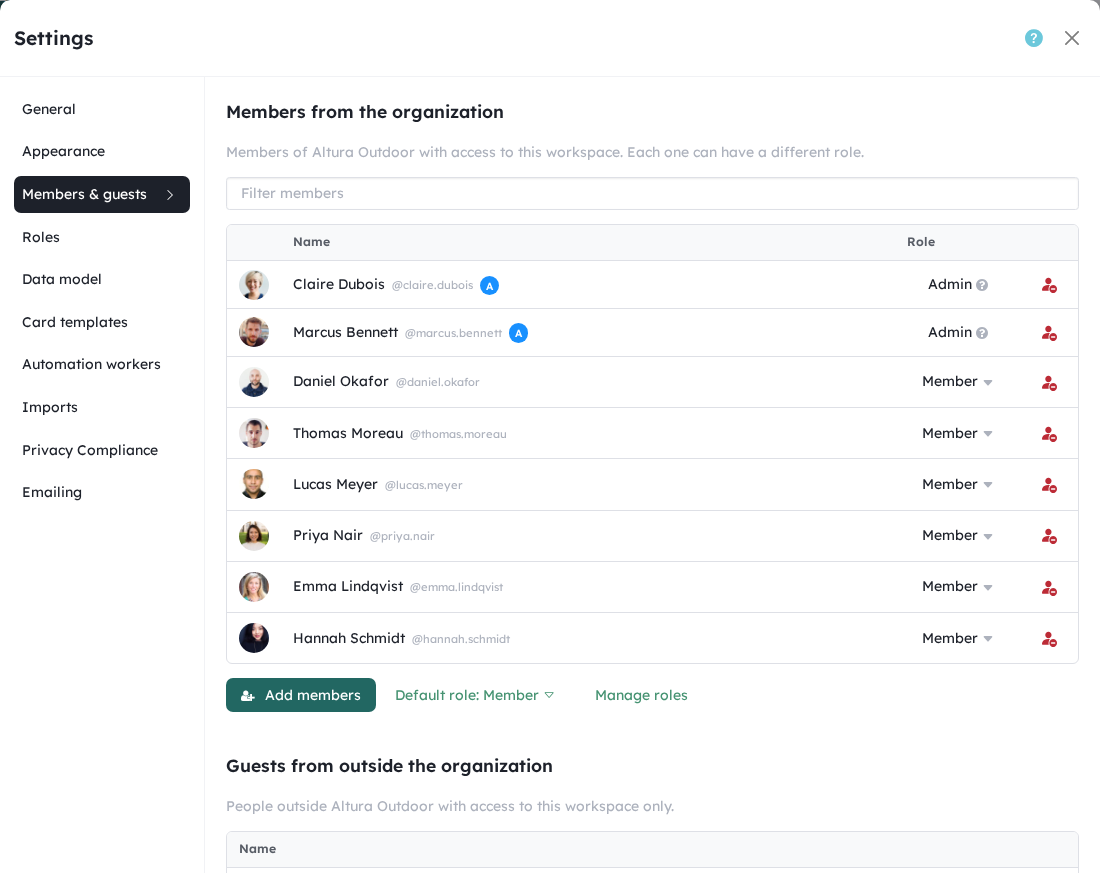
People outside your organization can join a workspace as guests. See Roles and permissions.
Share a view
- With members of the workspace: send them the address of the view.
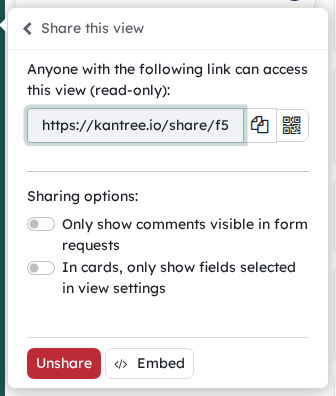
- With people who are not members: hover the view in the sidebar, click …, then Share this view. Anyone with the link can see the view, but cannot change it. You can also print the QR code of the link.
Talk on cards
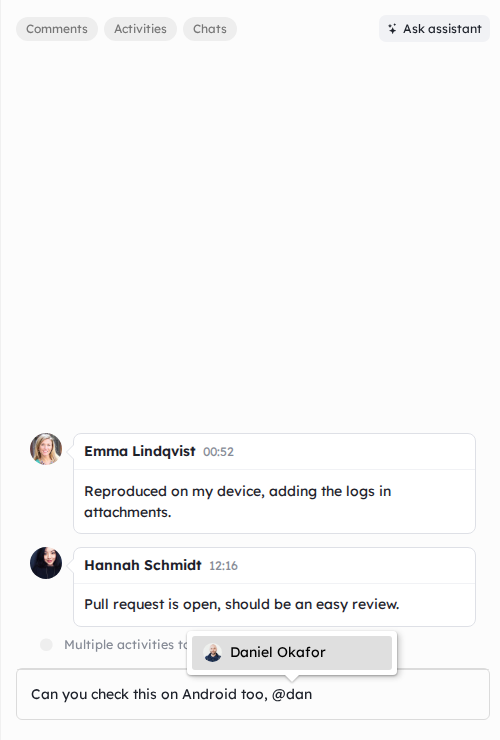
Use the comments of a card to talk about it with your team. Type @ followed by a name to mention a member: they get a notification.
Notifications
Kantree notifies you when someone mentions you, assigns a card to you, comments a card that you follow, and more.
Where you see them
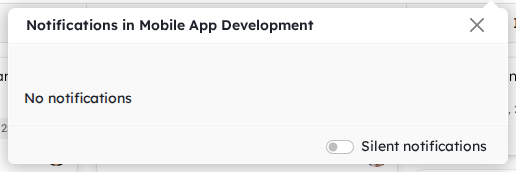
- The bell at the top right of a workspace shows the notifications of the workspace.
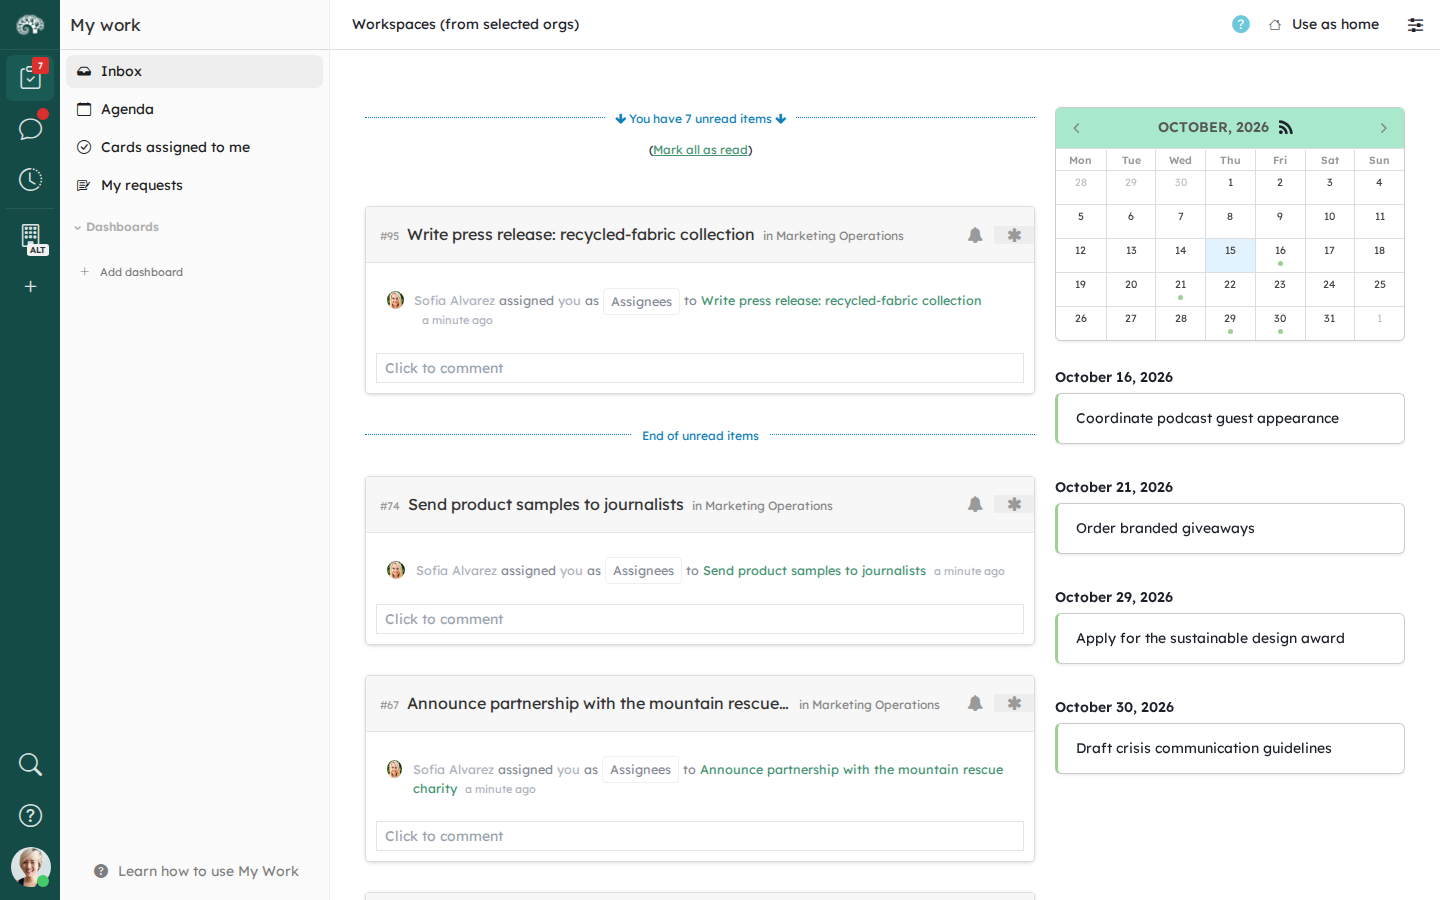
- My work shows the notifications of all your workspaces. The number on its icon is the number of unread notifications.
Follow a card
You follow the cards that are assigned to you. To follow another card, open it and click the bell at the top of the card. From this menu you can also add a reminder: Kantree notifies you at the date that you choose. See Reminders.
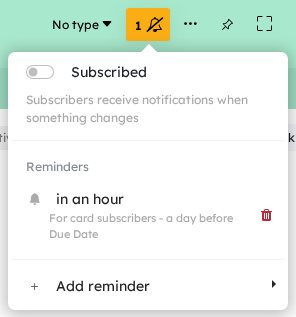
To follow several cards, select them (right-click, then Select), then click Subscribe to all in the actions. To follow all the cards of a column, click … at the top of the column, then Subscribe.
Choose your notifications
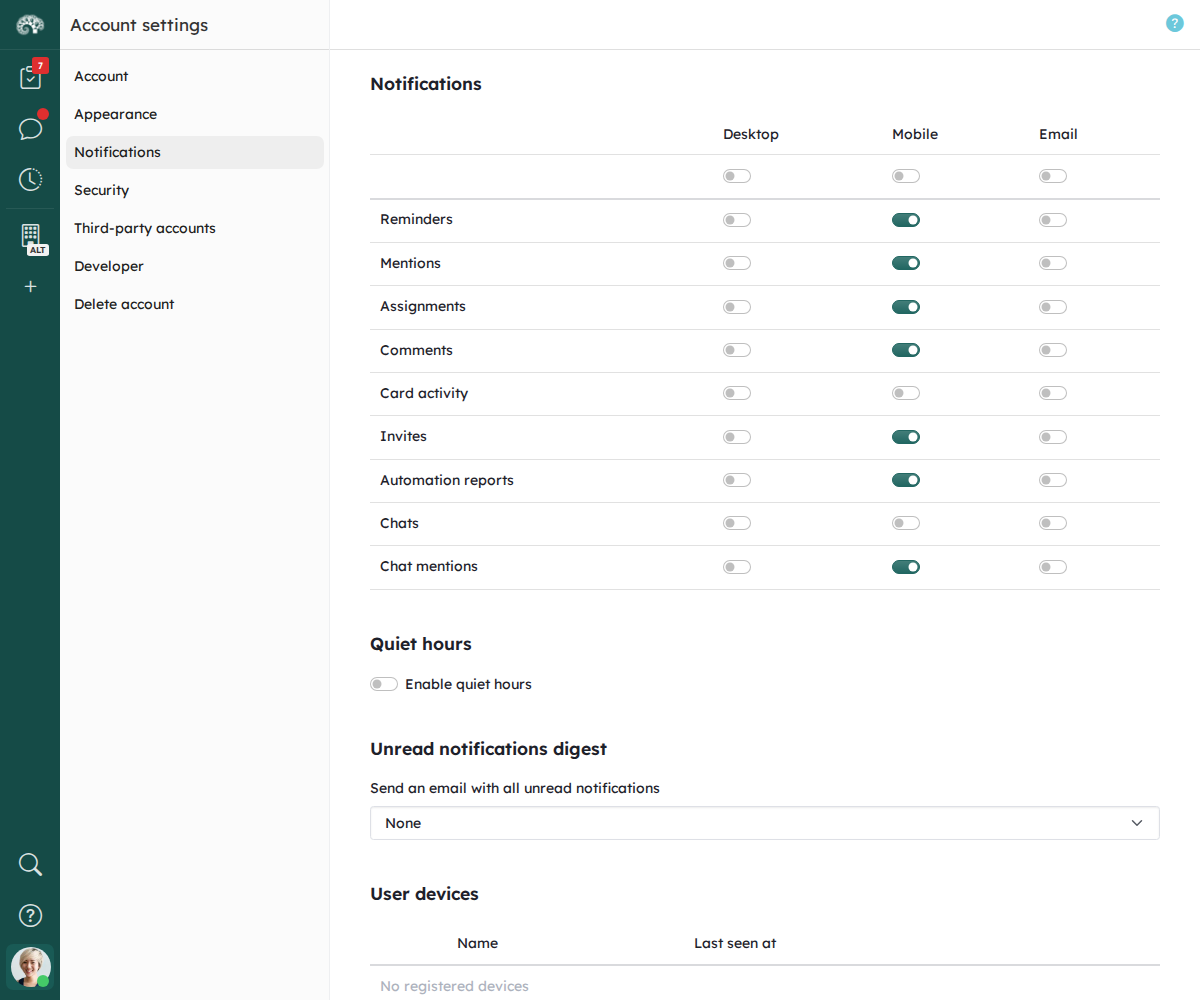
In Account settings, then Notifications, choose how you receive each type of notification: on your desktop, on your phone or by email. You can also set quiet hours and receive a digest of your unread notifications.
My work, your personal hub
My work collects in one place what concerns you in all your workspaces. Click its icon at the top of the app sidebar.
- Inbox: the latest activity on your cards. Click the star of an item to mark it as read.
- Agenda: your upcoming deadlines in a calendar.
- Cards assigned to me: the cards where you are in a member field.
- My requests: the requests that you sent with forms.
- Dashboards: your own dashboards, with data from several workspaces.
- Views: the views that you added to My work. In the menu of a view, click Add to my work.
Do you have a question?
Click the ? in the app sidebar to open the user guides. Ask our team for help, send feedback and suggest new features at support.kantree.io.