Kantree is the central hub for your team’s work. It brings all your information together in one place, enabling everyone to easily collaborate and update project cards and tasks in real time.
Because it is easy to use, it improves team coordination. Never lose information in emails or messaging apps again!
Private projects
To make your project private—meaning it is visible only to you and the members you invite—you must select “Private – Only you and invited members can view and participate in this workspace” when creating the workspace, or later from the workspace settings.
Only users with an Organization Admin or Organization Owner role can access private workspaces.
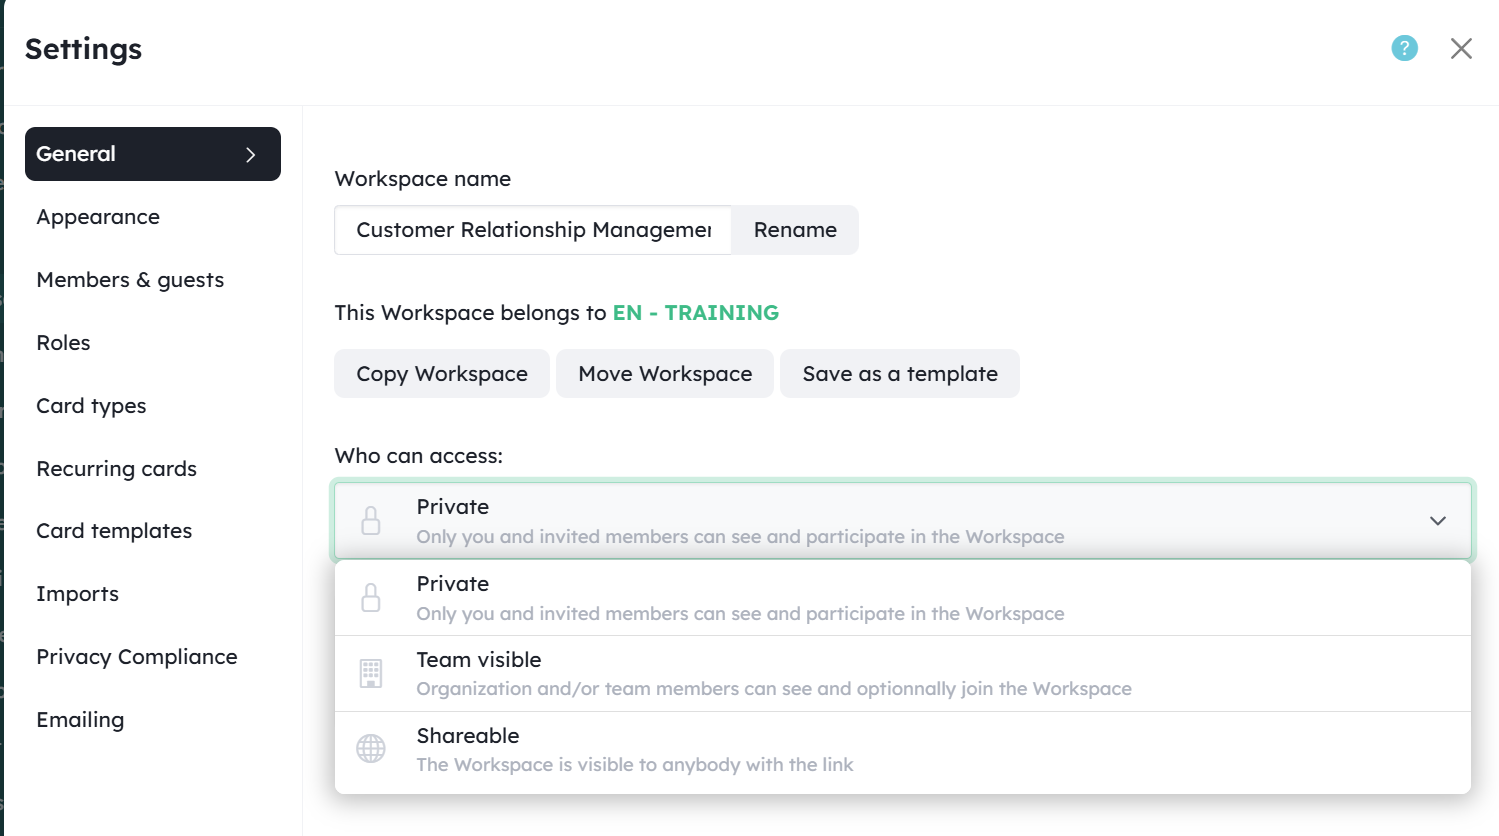
When selecting “Visible to the Team”, the workspace becomes visible to Organization members and may or may not be joinable depending on whether the option “Team members can join this project on their own” is enabled.
If this option is enabled:
- The project is visible to all Organization members.
- Members can join the project themselves and gain editing access according to the default permissions.
- You can define the role automatically assigned to members who join the project themselves. To do so, go to the workspace menu or settings, then Members & Guests, and configure the Default Role option.

Projects accessible to everyone do not necessarily appear on every user’s Organization page. Users must be members of a project to see it in their workspace list. The complete list of projects remains available from the Organization page.
If you manage your own Kantree instance, you can enable private personal workspaces for users through the administration pages. See “6 - Personal Workspaces”

Public projects
Projects created within a team can be either private (default) or public.
You can choose which role is assigned to users (whether logged in or not) who access your project without being members or invited participants.
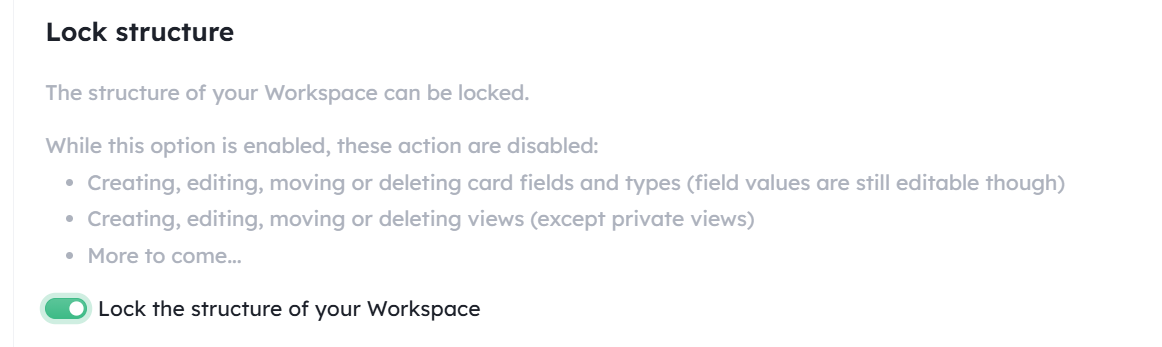
Securing the Workspace Structure
Workspace Administrators can lock the workspace structure from the workspace settings.
Currently, this applies to:
- Card structure
- Card types
- Fields
- Creation of public views
This lock also applies to Workspace Admins.
Adding members to your project
To invite members and manage access to your project:
- Open the project settings and select the Members & Access tab, or
-
Open the members sidebar and click Manage Members…
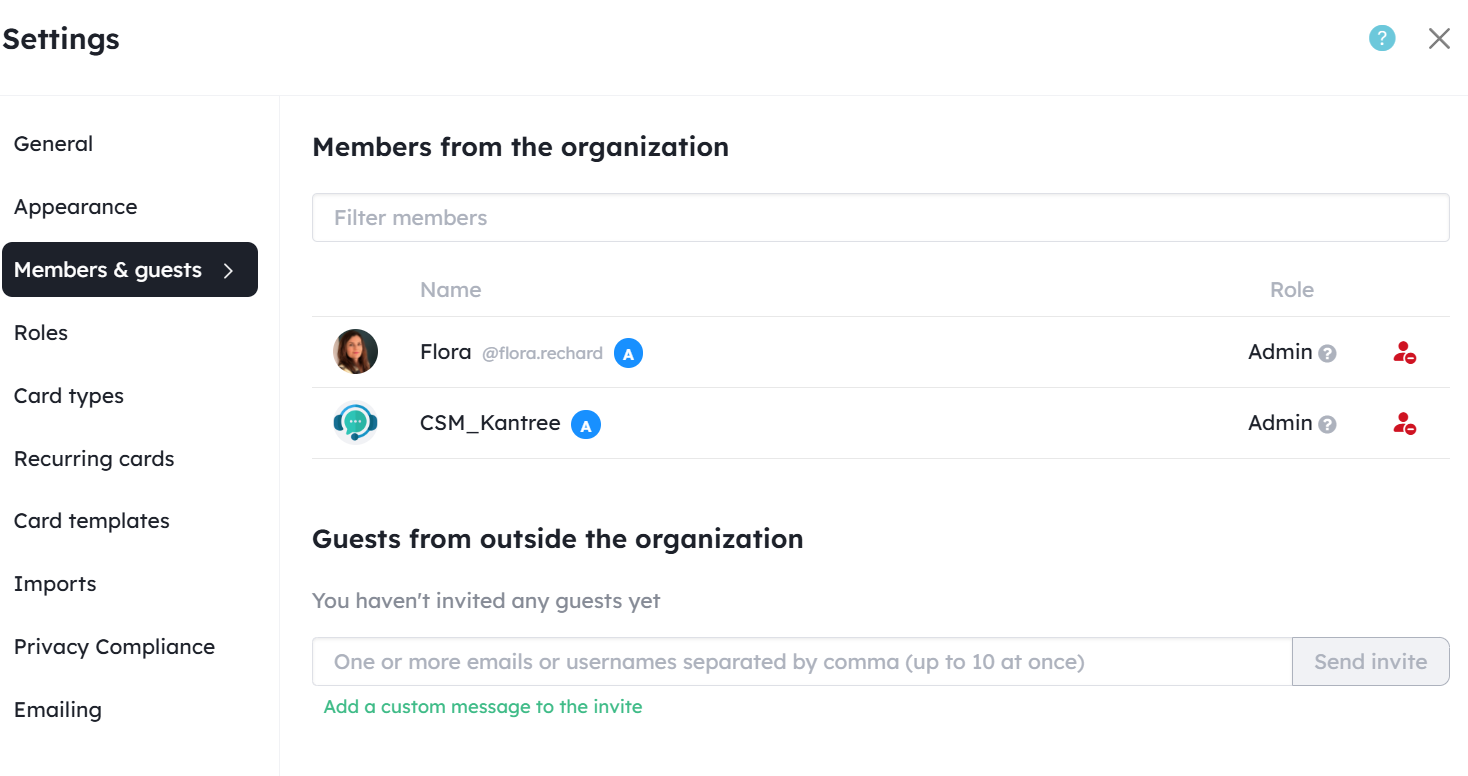
Then click + Add Member.
You will see the list of all team members and can select those you want to add to the project.
You can modify project member roles. Roles are defined at the team level (see “Managing Roles and Permissions”).
You can also invite external guests to collaborate on your project, such as partners or contractors.
Simply enter their Kantree username (if they already have an account) and/or their email address (if they are new users), separated by commas.
Any existing role can be assigned to guests.
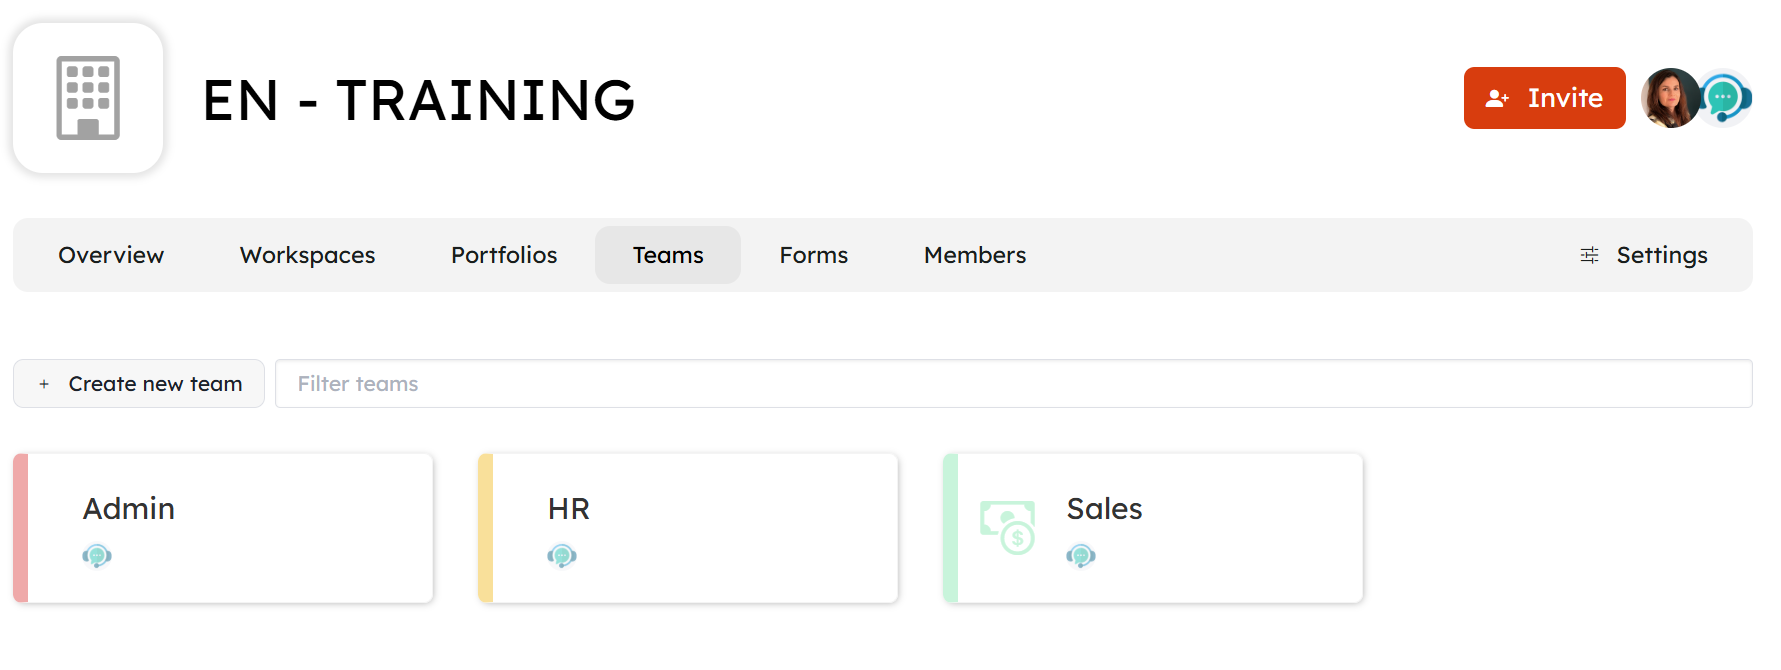
Creating a Team
If you subscribe to a Business or Enterprise plan, you can create Teams.
Teams are spaces within your Organization that allow you to group workspaces by department, collaborator group, business unit, or topic.
This improves visibility on the Organization page and enables member management at the team level.
Teams have their own permission system. As with workspaces, you can add or remove team members and assign roles.
Managing roles and permissions
How Permissions Work
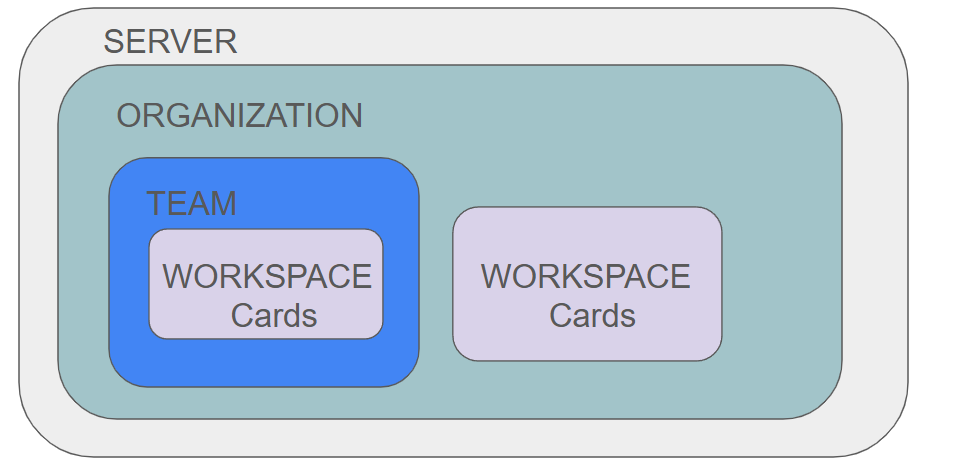
To provide precise access control, Kantree manages permissions across four different levels.
The Four Permission Levels
- Server (Private Cloud or Self-Hosted only)
- Organization
- Team
- Workspace
Definitions – Roles and Permissions
A role is defined by a name and a set of permissions.
- A role refers to the level of participation within a given space (e.g., an Admin role, a Member role).
- A permission refers to the scope of access to a specific feature.
Examples: permission to edit cards, permission to archive cards.
How Spaces and Roles Work
- Spaces are independent, and a user may have a different role in each space.
Example: a user can be an Organization Admin and a Workspace Member. - An Admin role grants authority over the entire space they administer. Admins are also considered administrators of any associated subspaces.
Example: an Organization Admin is automatically considered an admin of all teams and workspaces within that organization.
Role Details
1. Server Roles
These roles are available only for Private Cloud and Self-Hosted deployments.
1.1 SUPERADMIN
The Superadmin is the global administrator of the Kantree environment. They can view and manage all spaces and their content, including personal workspaces. They also have access to private views within workspaces.
Private Cloud deployment note:
One Kantree Superadmin also has access to your environment in order to provide support and perform actions upon your request.
1.2 ADMIN
This role allows users to manage server-level user access and Organizations. However, it does not grant access to Organization content, Organization pages, or workspaces unless the user has been explicitly invited.
1.3 USER
This is the default role assigned when a new license is activated. Users can join or create an Organization and create personal workspaces if the Superadmin has granted the corresponding permissions.
1.4 UNLICENSED
This role does not grant any permissions other than viewing a workspace. Users with this role do not consume a license.
2. Organization Roles
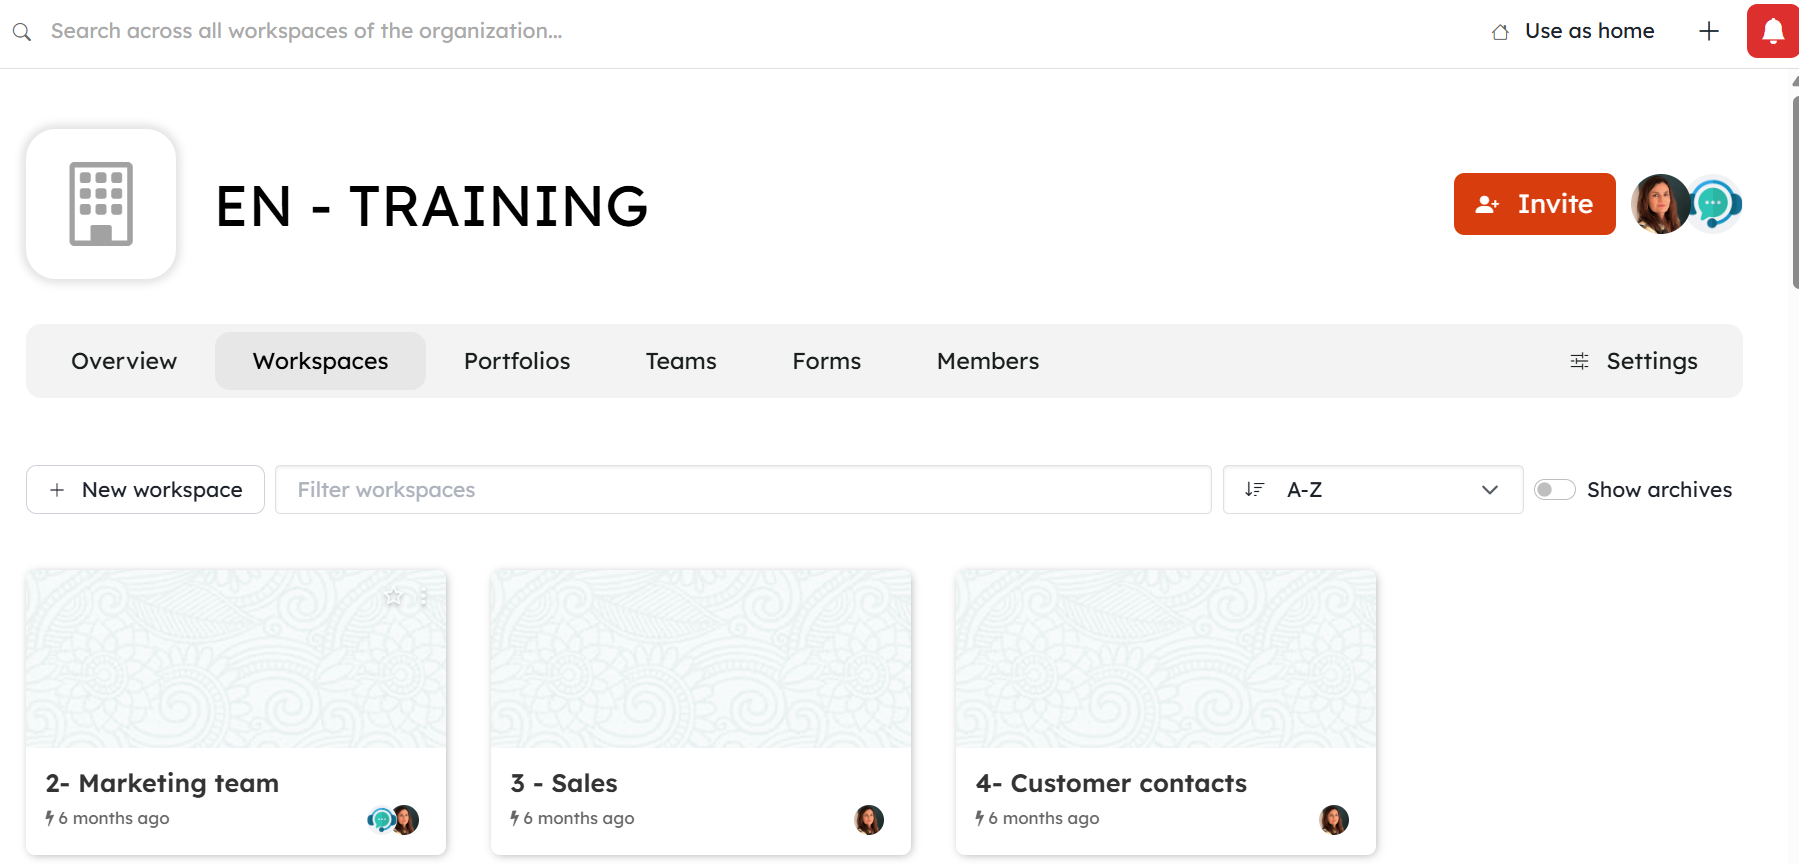
2.1 Organization Page
The Organization page provides an overview of projects that can be organized within teams.
This page can be set as your Kantree home page by clicking Use as Home.
The page is accessible from the left sidebar by clicking the Organization icon.
It is available to all Organization members.
2.2 OWNER
This role is intended for Public Cloud deployments.
The Owner is an Administrator with additional billing management capabilities.
For Private Cloud and Self-Hosted deployments, this role is equivalent to Administrator.
2.3 ADMIN
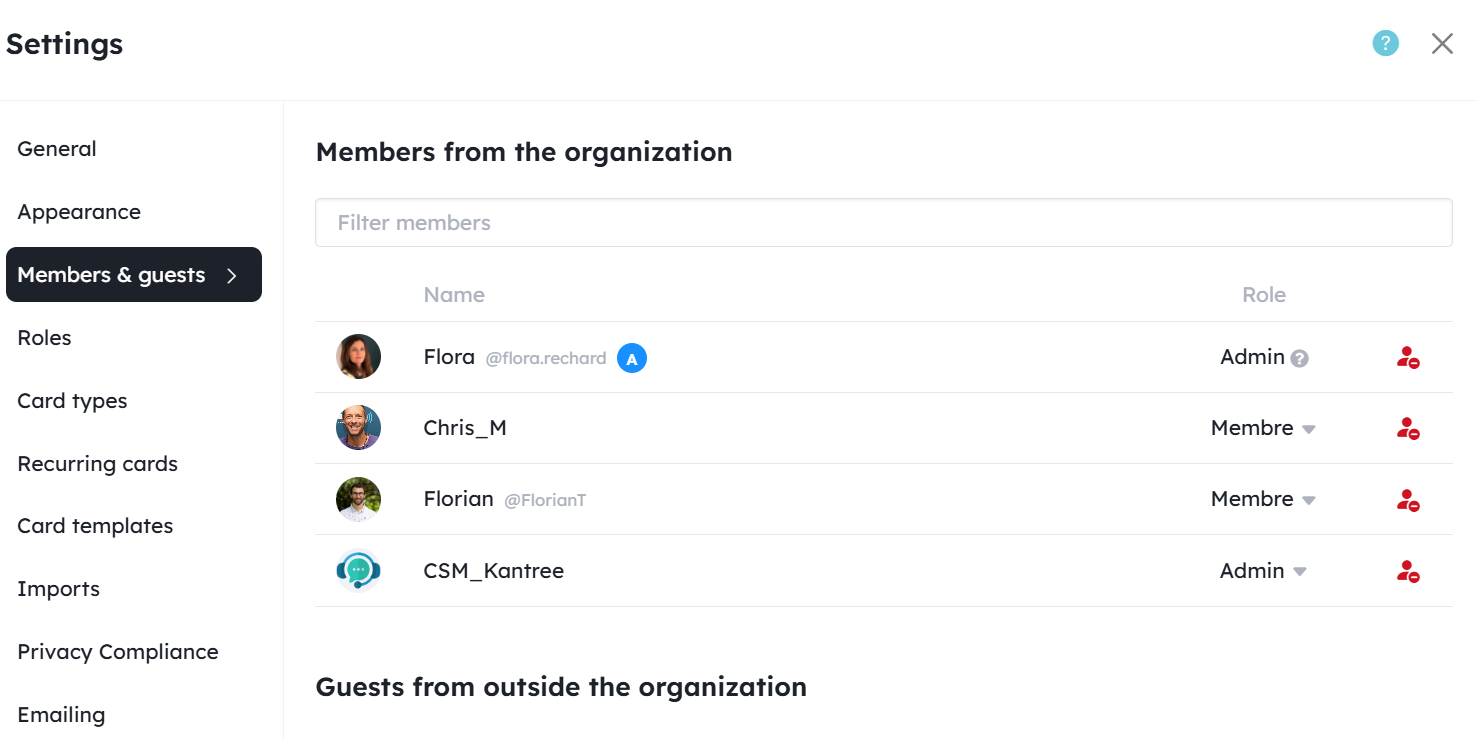
Administrators have access to Organization settings, including user management, role assignment, and permissions management.
Public Cloud deployment: Administrators have read-only access to billing information.
Because of their Organization-level role, both Admins and Owners have the highest level of permissions within Teams and Workspaces. They can access all Organization workspaces, including those marked as Private.
2.4 MANAGER
Manager is the default role assigned when a user is added to an Organization.
Managers can create workspaces.
Private Cloud and Self-Hosted deployments: A different default role can be configured. Please contact support for assistance.
2.5 USER
Users can access the Organization page and view Organization members.
They have read-only access to public workspaces, meaning workspaces whose visibility is set to Team Visible or Shareable.
Users may have editing rights on public workspaces depending on the permissions granted to them at the Team and/or Workspace level (see the Workspace Roles section).
Users cannot create new workspaces.
Private Cloud and Self-Hosted deployments: Users may be authorized to create personal workspaces (stored in their Personal Space) if this permission has been granted by the Server Administrator.
2.6 CONTRACTOR
Available only for Public Cloud deployments
Contractors can access Shareable workspaces by invitation in read-only mode.
They do not have access to the Organization page and cannot perform any editing actions.
3. Team Roles

3.1 TEAM ROLE: ADMIN
Administrators have access to Team settings, including user management, role assignment, and permissions management.
3.2 TEAM ROLE: MANAGER
Managers can create workspaces within the Team they manage, but they cannot administer the Team space or manage users.
Note: This role is currently being redefined.
3.3 TEAM ROLE: USER
Users can join any shared workspace within the Team on their own (without requiring an invitation), except for workspaces where the setting “Team members can join this workspace on their own” has been disabled.
Their permissions within a workspace are determined by their Workspace role.
4. Workspace Roles
4.1 WORKSPACE ROLE: ADMIN
Workspace Administrators have access to Workspace settings, including user management, role assignment, and permissions management.
Workspace Administrators cannot configure Organization fields (fields shared across multiple workspaces within the same Organization) unless they also have the required Organization-level role.
4.2 WORKSPACE ROLE: MEMBER
Members can create, edit, and collaborate within a workspace.
4.3 WORKSPACE ROLE: COMMENTING OBSERVER
Commenting Observers can view cards, add comments, be assigned to cards, receive notifications, and create private views. They cannot generate public URLs for views.
This role is useful when collaborating with external partners who need visibility into the workspace without being granted editing permissions.
4.4 WORKSPACE ROLE: OBSERVER
Observers can view cards, be assigned to cards, receive notifications, and create private views. They cannot generate public URLs for views.
They cannot add comments.
4.5 WORKSPACE ROLE: NO PERMISSIONS
The No Permissions role can be assigned to a user, but the user cannot receive notifications.
Users with this role do not have access to any workspace, even if they appear in the workspace member list.
However, they can trigger automations from outside the workspace, for example through an email action button.
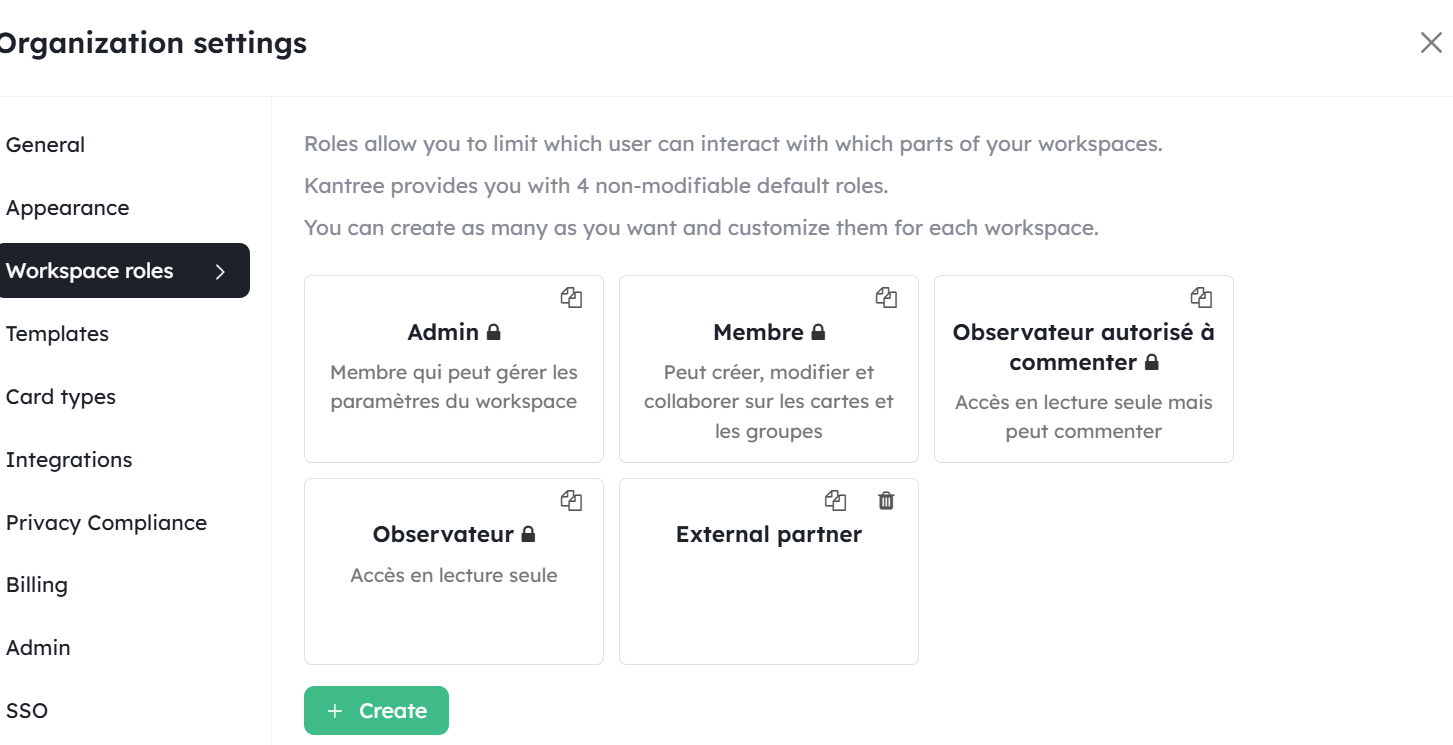
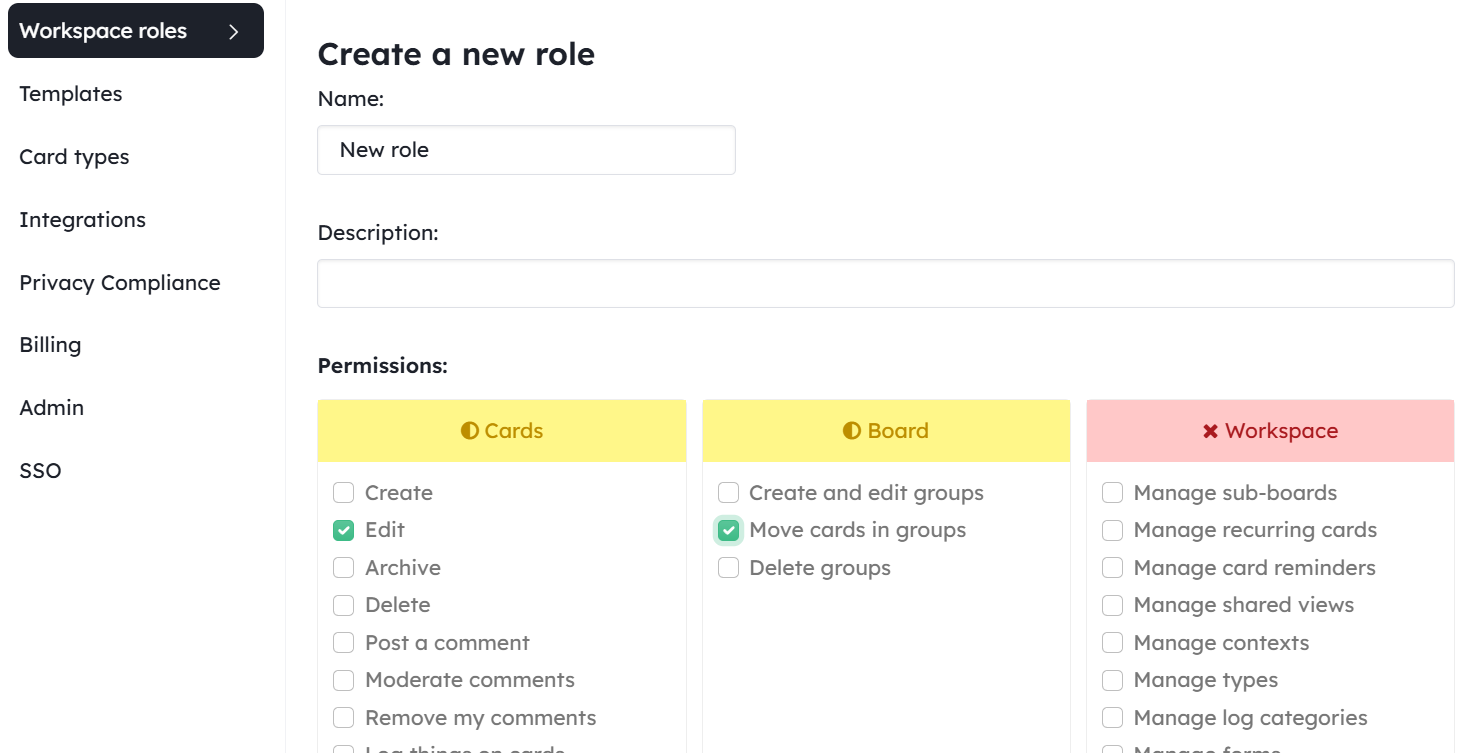
4.6 WORKSPACE ROLE: CUSTOM ROLE
Default roles cannot be edited, but they can be duplicated and used as a starting point for creating new roles. You can also create a custom role from scratch.
To access these settings, you must have at least the Organization Admin role.
Go to Organization Settings → Workspace Roles → Create.
Enter a name for your new role and select the permissions you want to grant. A wide range of permissions can be enabled or disabled, allowing you to control actions ranging from card creation and editing to member management and form administration.
Once the new role has been created, it will be available in the list of Workspace roles for that Organization.
5 - Visibility Options and Permissions for Specific Workspace Elements
5.1 Visibility Options
A workspace can be joined either with or without an invitation. This setting can be configured by the workspace Administrator in the workspace Settings. See above “Private projects”
View Sharing Options
Generate a Share URL / QR Code
In this case, anyone with the link can access the view in read-only mode.
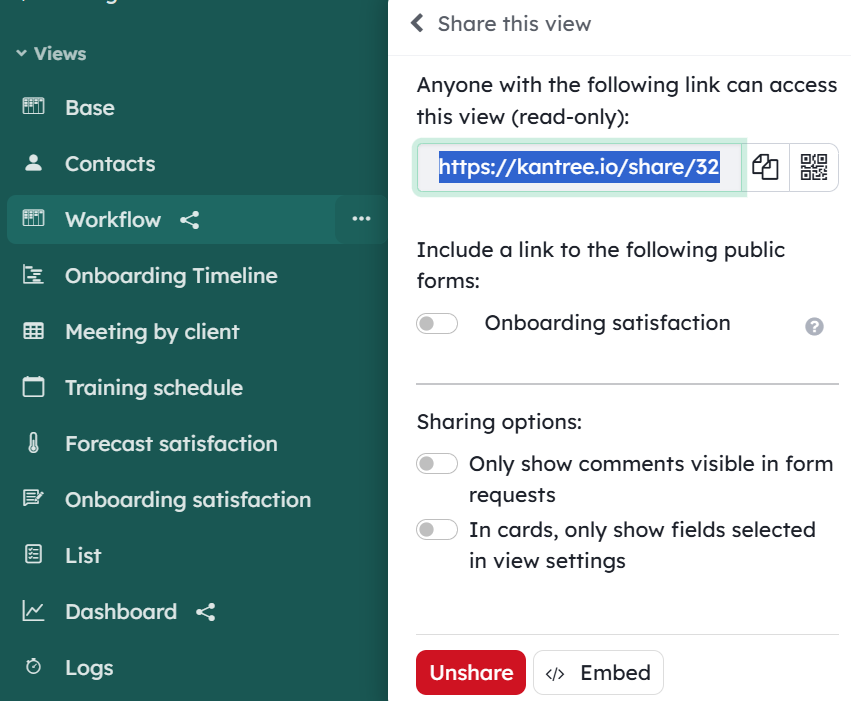
Options:
View-by-View Visibility Configuration
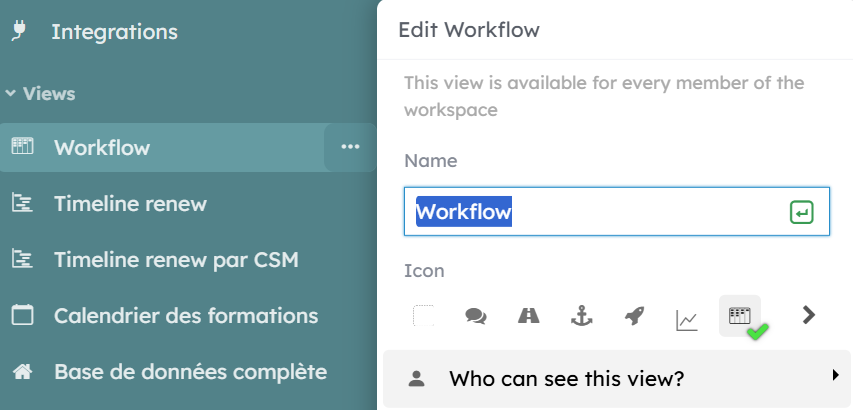
You can grant access to specific views to one or more custom roles. This option is also available for subtable views.
This allows you to:
- Manage a wider range of user groups within the same workspace.
- Encourage collaboration without creating multiple workspaces.
See also: Custom Workspace Roles.
💡 Use case: You want to grant editing rights only on a specific view (for suppliers, partners, or other internal organizations).
Standard Kantree roles cannot be configured through this feature: Administrator, Member, Commenting Observer, and Observer.
ℹ️ Changes to these permissions become visible to users after they refresh the page (updates are not applied in real time without a page refresh).
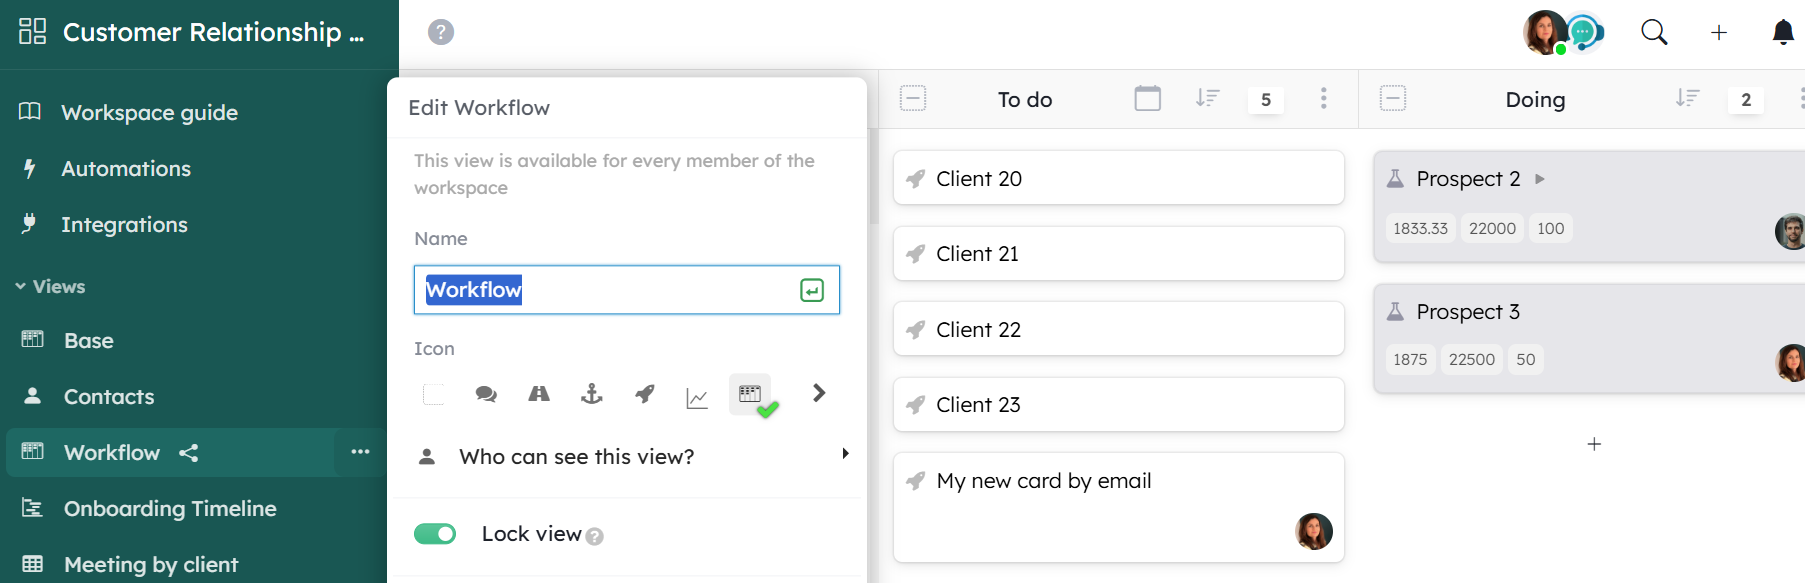
Locking a view
To prevent modifications to a view, the workspace Administrator can lock it. When this option is enabled, the toolbar (Group, Filter, Sort, Appearance, and the Save button) is no longer accessible. This option is available for both public and private views.
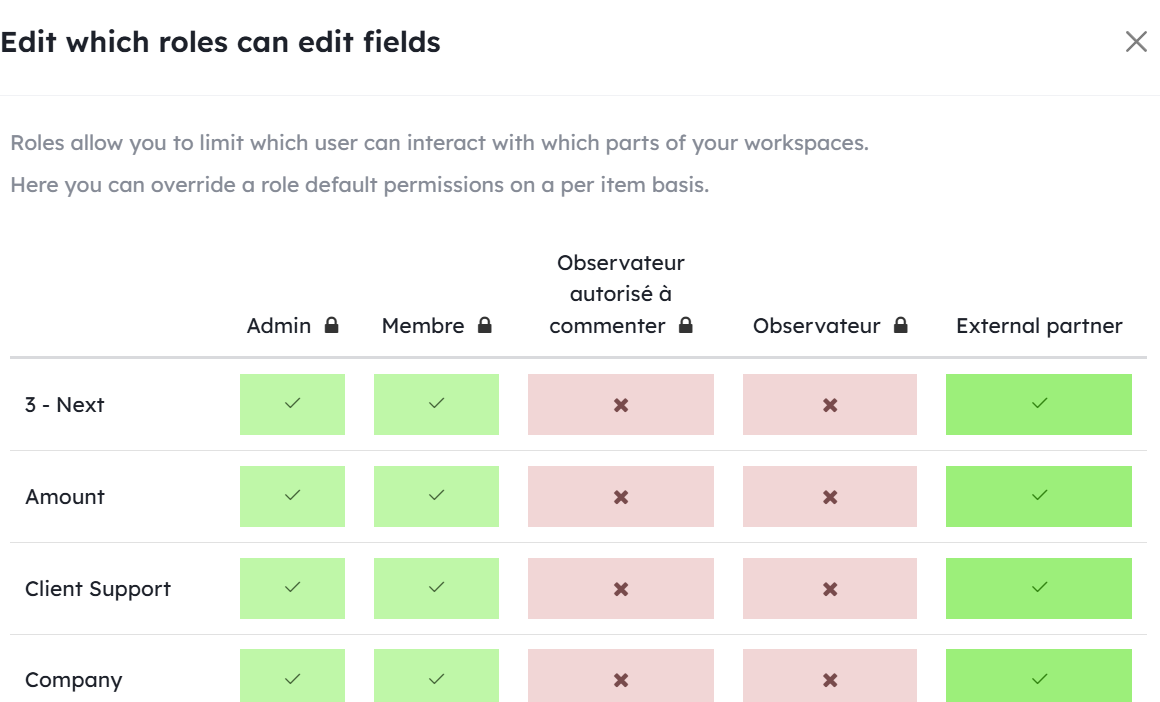
5.3 Field Permissions
You can manage editing permissions down to the field level.
Click the options menu for a field to see which roles have permission to edit it. If you have created custom roles, you can grant or restrict editing access for those roles on a field-by-field basis.
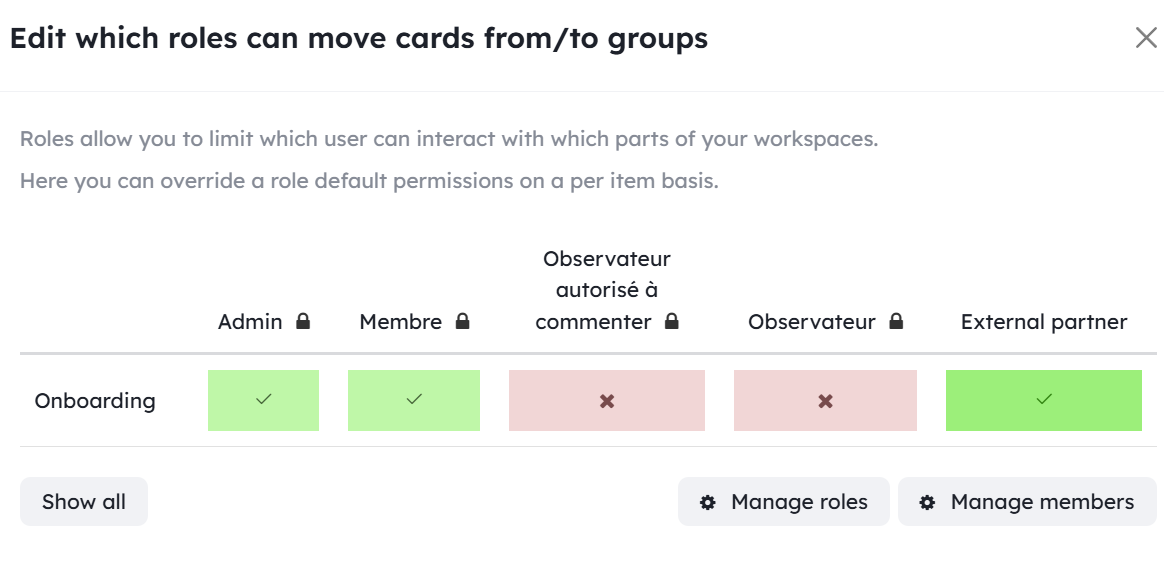
5.4 Group/List Permissions
You can manage editing permissions down to the group/list level.
Click the three-dot menu on a column and select Permissions.
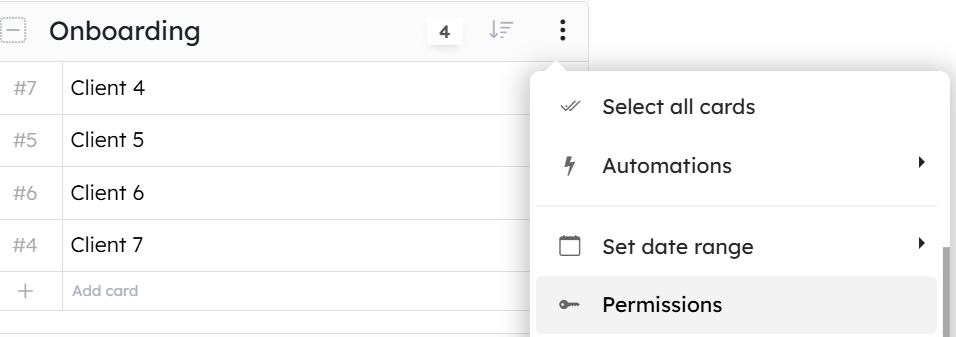
If you have created custom roles, you can configure editing permissions for each group, list, or column individually.
6 - Personal Workspaces
Feature available only with Private Cloud or Self-Hosted deployments
Each user can have their own Personal Workspaces area. This feature is enabled by the server Super Administrator, who has access to its configuration.
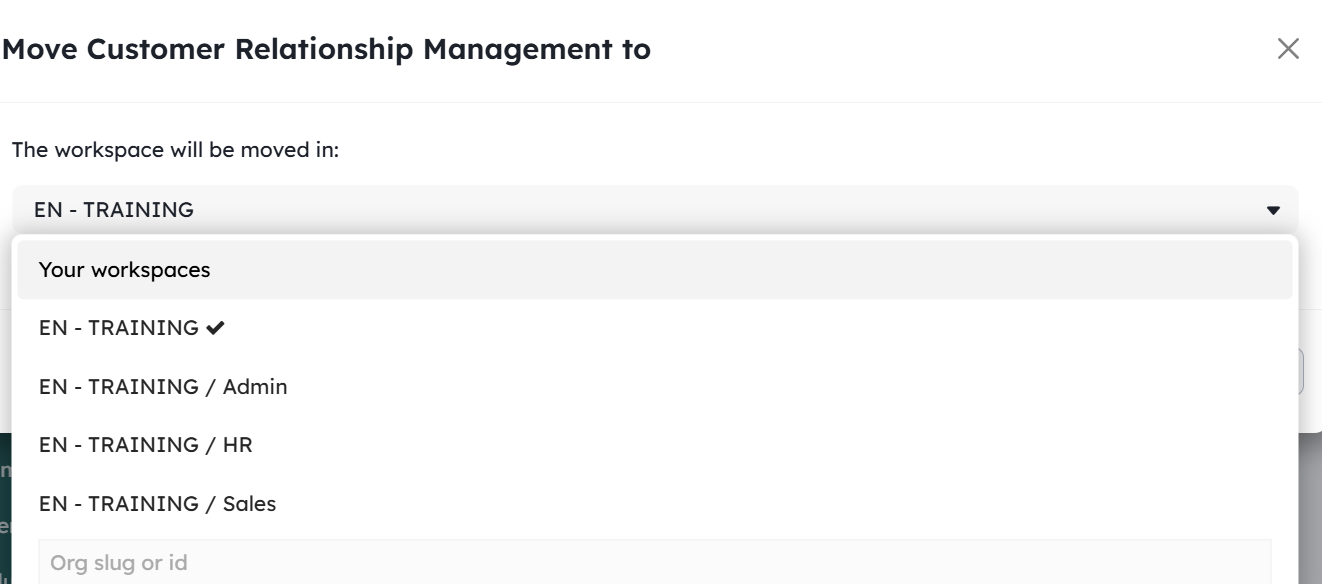
When you want to move a personal workspace to a Team in order to share it, go to the workspace settings and select the destination Team from the dropdown list.
You must have at least the Manager role in the destination Organization.
Realtime
Changes in Kantree are applied in realtime. You do not need to refresh your browser for a change made by another user to be visible.
If you lose your Internet connection, a red notice will appear at the top of the interface and you won’t be able to edit until Internet is back.
Offline
If you load Kantree and some of your projects once, you can access them offline.
All the cards of your pre-loaded projects will be readable. You will be able to switch views and change how you group your cards. For now, you won’t be able to filter your cards while offline.
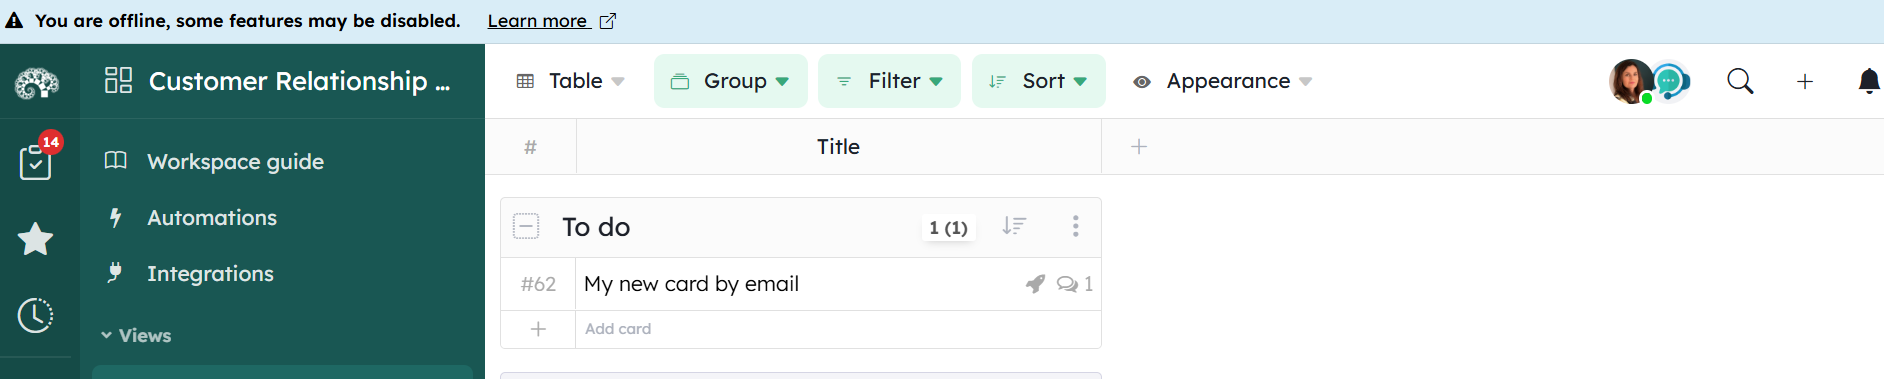
You will be able to create new cards and add comments, all will be synchronized once you will be online again.
Assigning Cards
In your project’s cards, you will find a default field called Assignees.
This field allows you to assign cards to project members. You can assign multiple members to the same card.
Assigned members are automatically [subscribed to the card](/help/guides/collaboration#subscribing-to-cards-and-groups). They will be notified of any changes made to the card.
You can add additional Member fields to define multiple roles, such as Reviewer, Tester, Writer, Developer, or Designer. See the [Card Customization Guide](/help/guides/customize-cards).
These assignments can be used to create charts in your [project reports](/help/guides/analytics).
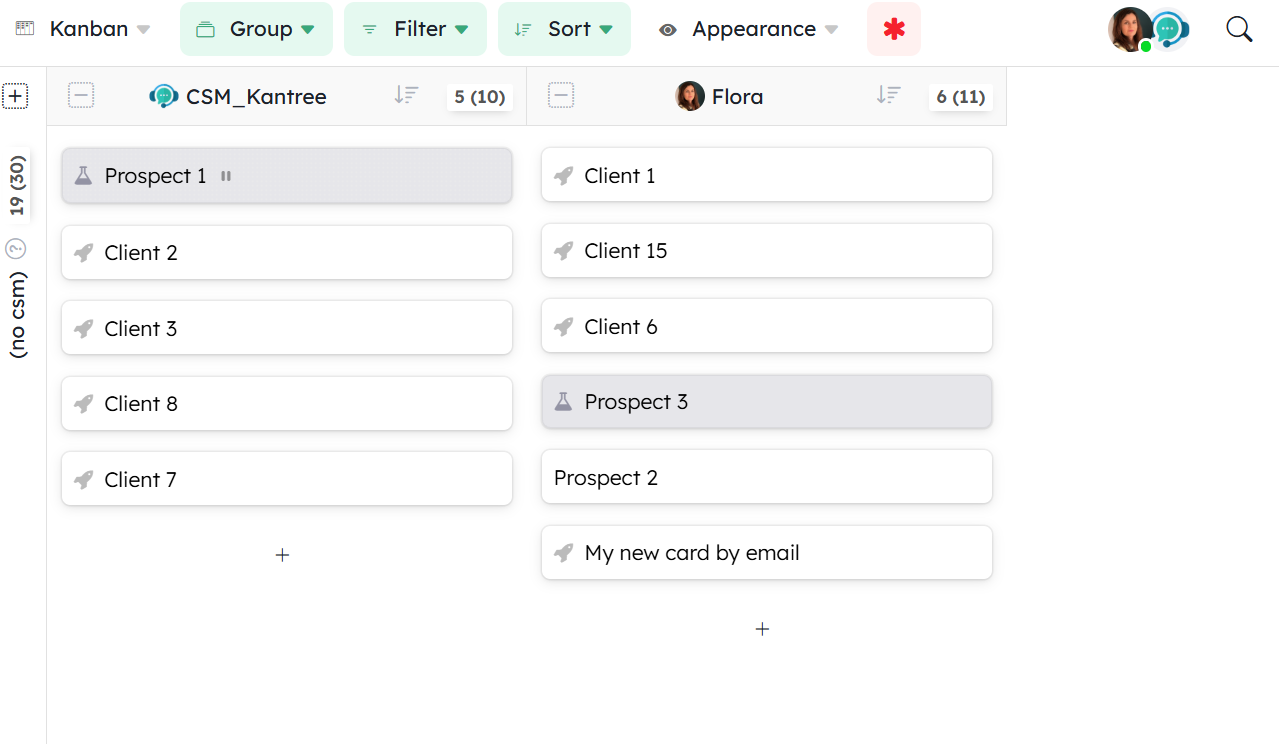
You can also group cards by Assignees in your Kanban view or in your [Timeline](/help/guides/organize-a-project#timeline).
You can add more member fields to specify different roles (like Reviewer, Tester, Writer, Developer, Designer…).
See the [customize cards guide](/help/guides/customize-cards).
This assignments will be used to create some charts in your [project reports](/help/guides/analytics).
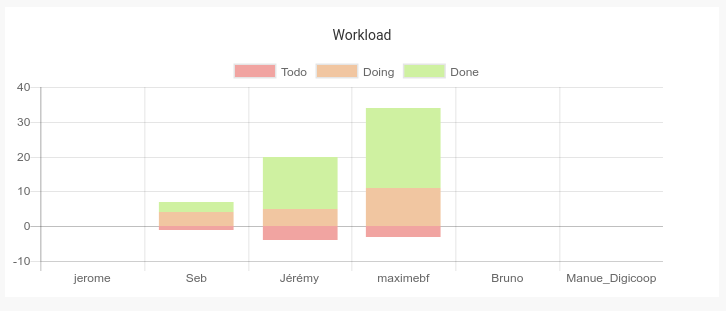
You can also group your cards by Assignees in your Kanban board or in your [Timeline](/help/guides/organize-a-project#timeline).
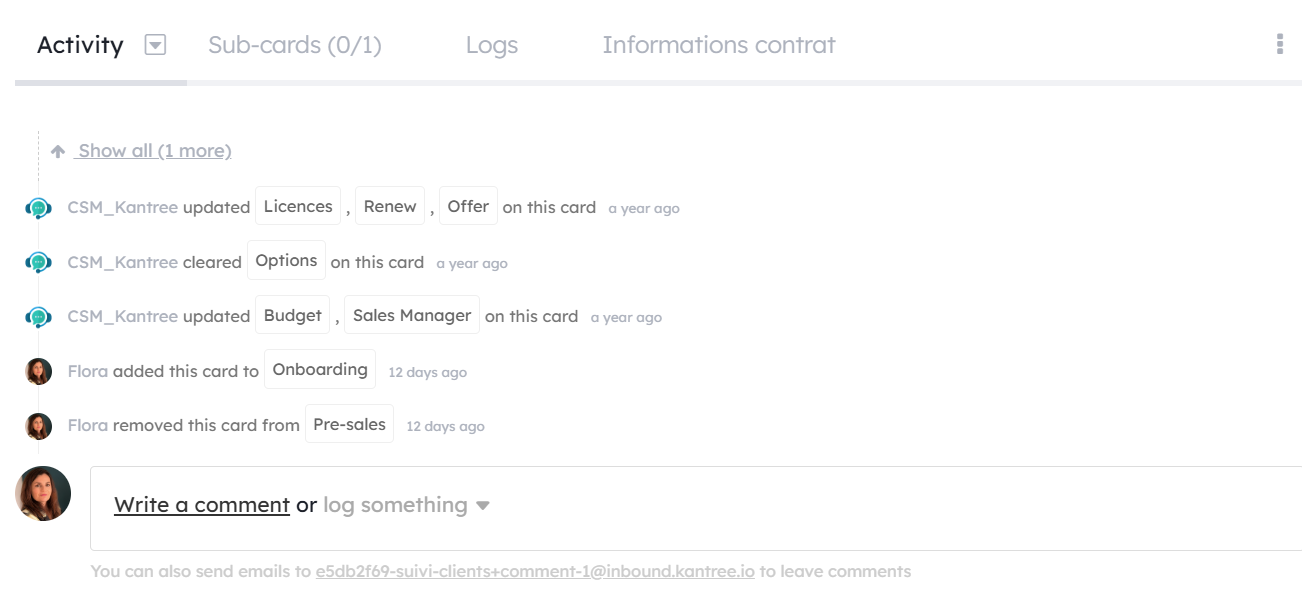
Commenting on Cards
Comments allow you to discuss a card with your collaborators.
You can find them in the Activity tab of your cards. Comments are updated in real time.
You can choose to use either the rich text editor or the Markdown editor. Note that Kantree supports GitHub Flavored Markdown.
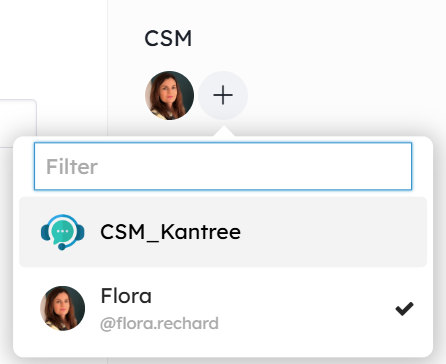
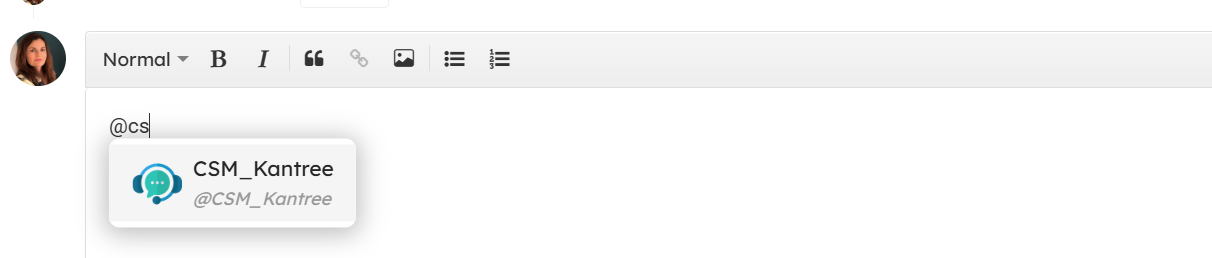
Mention members in a comment using @username to notify them about the comment. This is a simple way to draw their attention and invite them into a conversation.
Type @ to open a popup listing project members. You can navigate through the list using the Up and Down arrow keys. Press Enter or Tab to confirm your selection, or click directly on a member.
If you continue typing the first letters of the name you are looking for, the member list will be filtered so that only matching names are displayed. The filter is case-insensitive.
Every member [subscribed to the card](/help/guides/collaboration#subscribing-to-cards-and-groups) or mentioned in a comment will receive a [notification](/help/guides/collaboration#notifications), either in the application or by email.
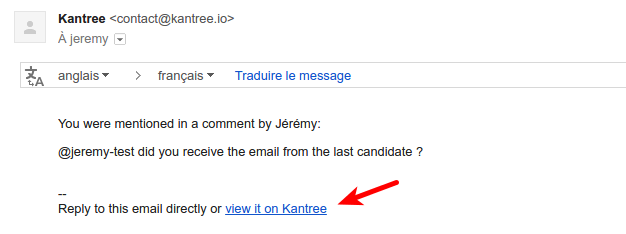
You can reply directly to the email, and your reply will be added as a new comment on the card (the @username mentions also work in emails, although the autocomplete popup is not available).
Link to a card by including its reference number using #id. Anyone reading the comment can then open the linked card directly from the comment.
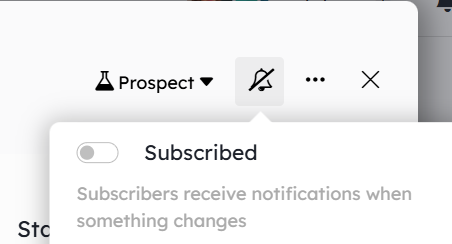
Cards and groups subscription
In Kantree, you can subscribe to cards and groups and receive [notifications](/help/guides/collaboration#notifications) whenever changes occur.
Once subscribed, you can unsubscribe at any time by clicking Unsubscribe.
You are not subscribed when the bell icon is crossed out and not displayed in black.
If the bell icon is black, you are subscribed.
If the workspace notification bell has a red background, you have unread notifications.
You are not subscribed when the bell icon is crossed out and not displayed in black.
If the bell icon is black, you are subscribed.
If the workspace notification bell has a red background, you have unread notifications.
You are automatically subscribed when:
- Someone (or you) assigns a card to you.
- You create a card.
You can also subscribe directly to a group. Open the group’s options menu and click Subscribe.
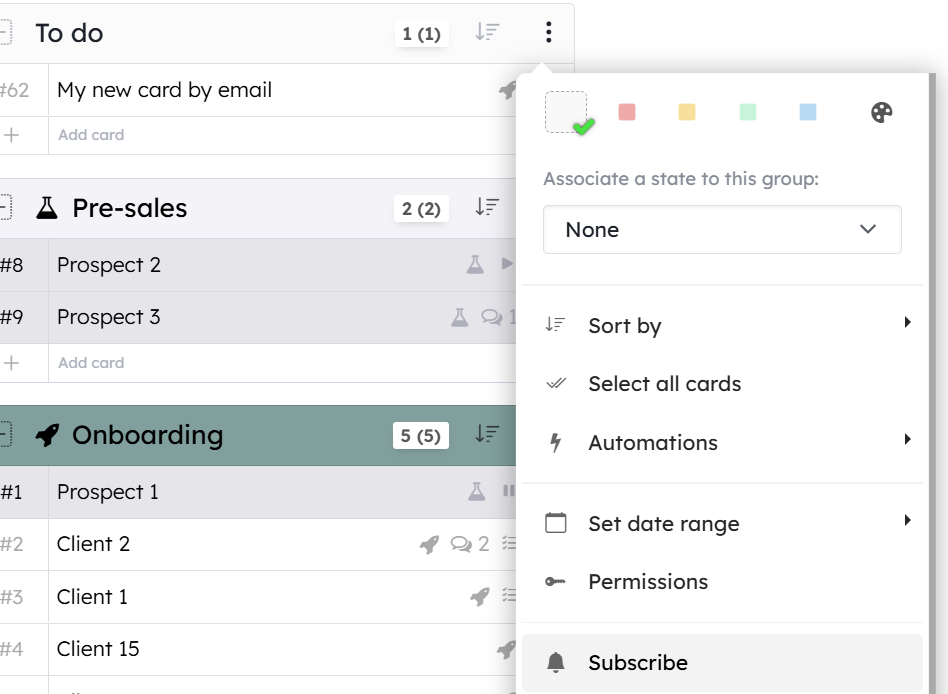
Once subscribed, you will receive notifications whenever a card is added to or removed from the group.
From the group’s options menu, you can Unsubscribe or enable/disable Card Notifications. This allows you to receive notifications for any changes made to cards in the group without having to subscribe to each card individually.
Reminders
From the card subscription menu (described in the previous section), click Add a Reminder to schedule a reminder for any point in the future.
You can choose which users will receive the reminder.
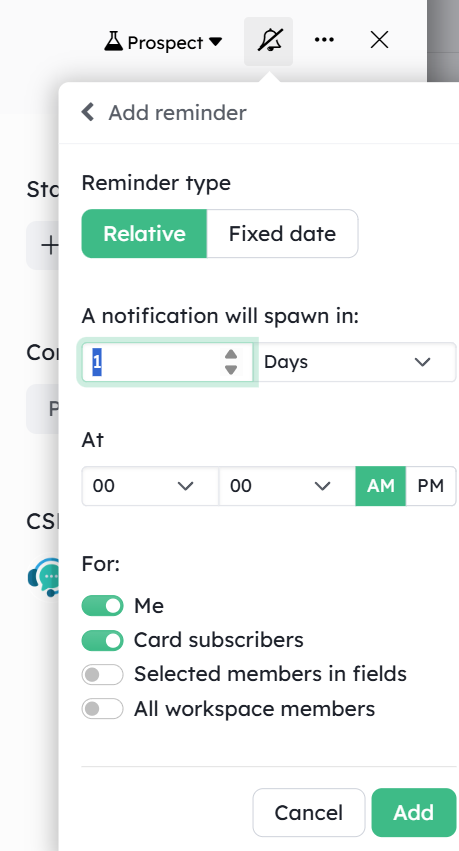
When the reminder becomes due, a notification is sent to the selected users both in the application and by email (if they have enabled email notifications).
If one or more reminders are active on a card, a bell icon badge will be displayed on the card.
You can delete reminders before they are triggered.
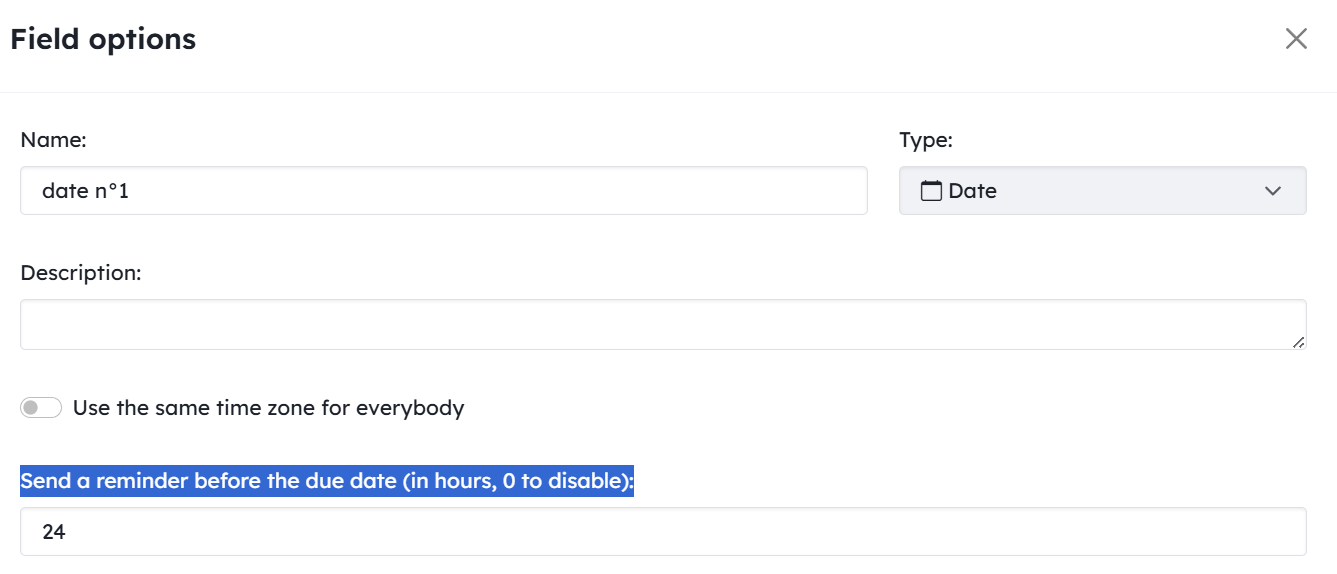
Date fields automatically create a reminder 24 hours before the due date. You can change this behavior from the field options.
Notifications
Notifications are sent to [subscribed members](/help/guides/collaboration#subscribing-to-cards-and-groups) and [users selected in reminders](/help/guides/collaboration#reminders).
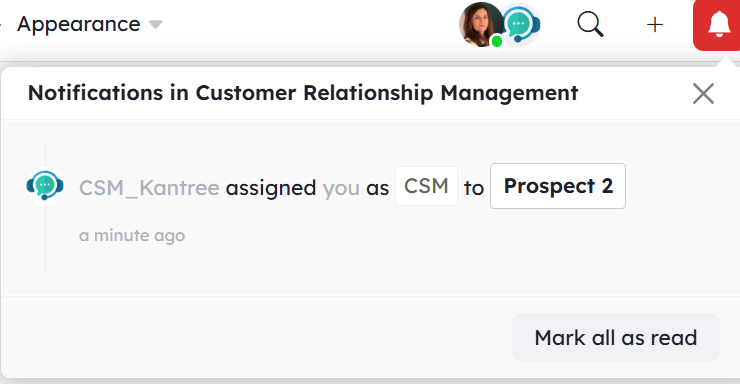
Notifications can appear in the application. When you have unread notifications, the notification bell in the top-right corner of the page turns red, and a (1) badge appears in your browser tab.

Click the bell icon to view notification details. Click Mark all as read to reset the bell icon to black, indicating that there are no unread notifications.
If you have enabled email notifications, you will also receive an email for each notification.
You will also receive a notification whenever your username is mentioned in a comment.
All your notifications are centralized in your personal My Work workspace. See My Work - Your Personal Workspace.
Some actions generate email notifications only and do not create in-app notifications (see the list below).
List of actions that generate notifications
| Action | Who is notified | In-app | |
|---|---|---|---|
| Mention in a comment | Mentioned users | ✔️ | ✔️ (even if disabled in the project) |
| Add a comment to a card | Card subscribers | ✔️ | ✔️ |
| Assign a card through a Member field | Card subscribers and the assigned member | ✔️ | ✔️ (assigned member only) |
| Unassign a card from a Member field | Card subscribers and the unassigned member | ✔️ | ✔️ (unassigned member only) |
| Move a card as a sub-card of another card | Card subscribers | ✔️ | ✔️ |
| Move a card to a different group (via context or label fields) | Card and group subscribers | ✔️ | ✔️ |
| Move a card to a different project | Card subscribers | ✔️ | ✔️ |
| Convert a card into a project | Card subscribers | ✔️ | ✔️ |
| Convert a project into a card | Top-level card subscribers | ✔️ | ✔️ |
| Archive / Restore / Delete a group | Top-level card subscribers | ✔️ | |
| Change a card’s status | Card subscribers | ✔️ | ✔️ |
| Archive / Restore / Delete a card | Card subscribers | ✔️ | ✔️ |
| Create a card | Card and group subscribers | ✔️ | ✔️ |
| A card reminder reaches its due date (or a date field reminder) | Users selected for the reminder | ✔️ | ✔️ |
| Import a project from an external source (another tool, spreadsheet, etc.) | Project creator | ✔️ | |
| Invite a user to an organization or team | Invited user | ✔️ |
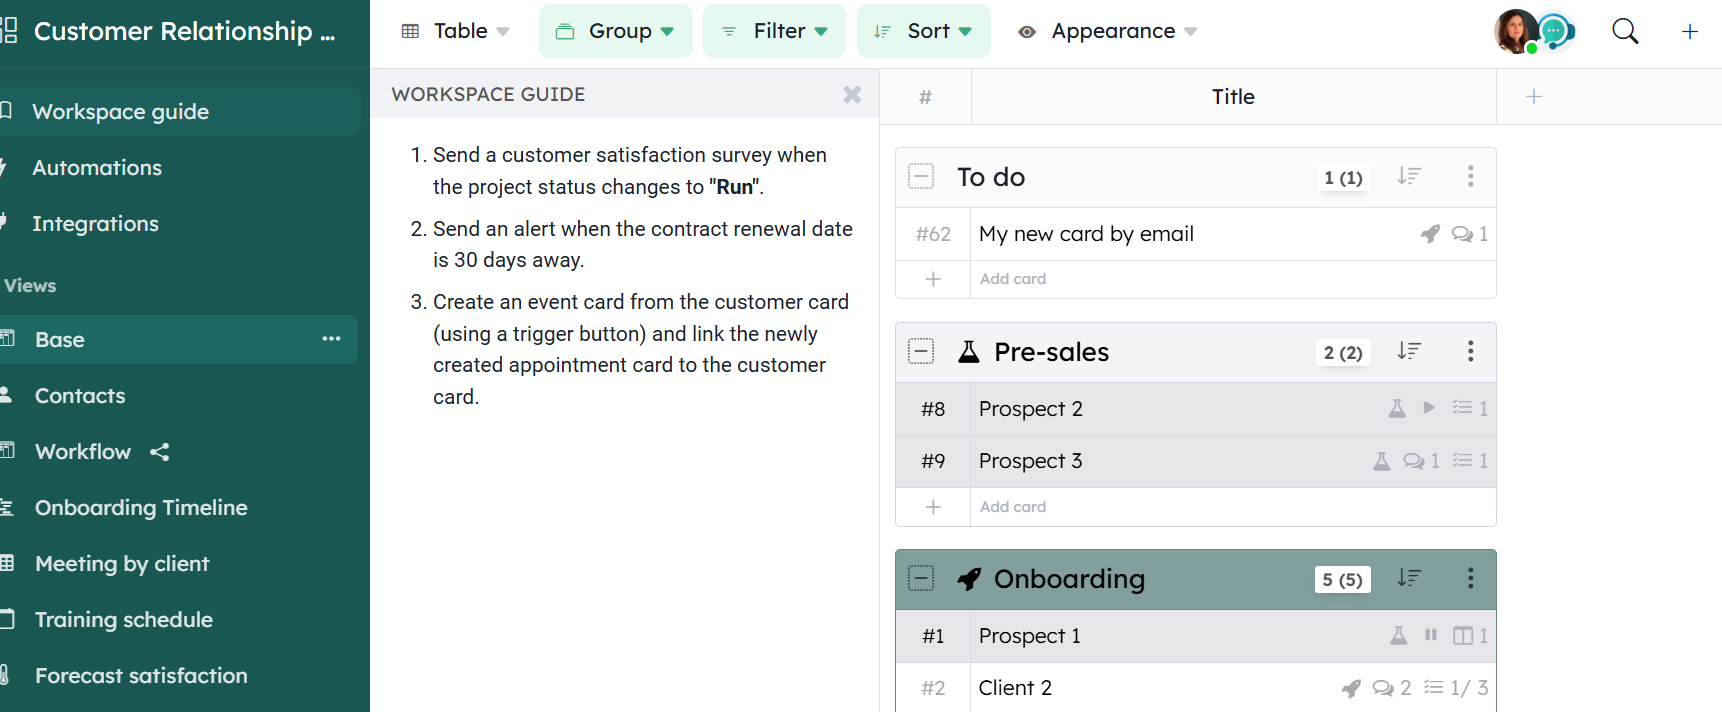
Project Guide
The Project Guide allows you to share project information with all your collaborators. You can use it as a wiki with basic text formatting capabilities.
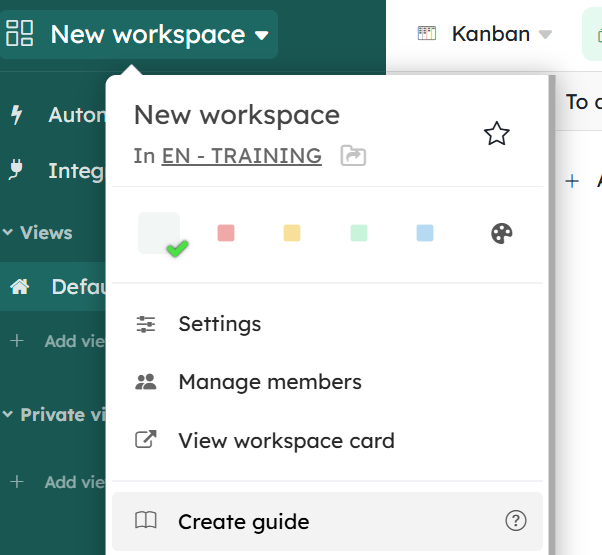
Once created, the guide appears in the workspace menu under Workspace Guide.
Journal View
The Journal view displays all activity within your project. You can filter the journal by time period, members, or activity types.
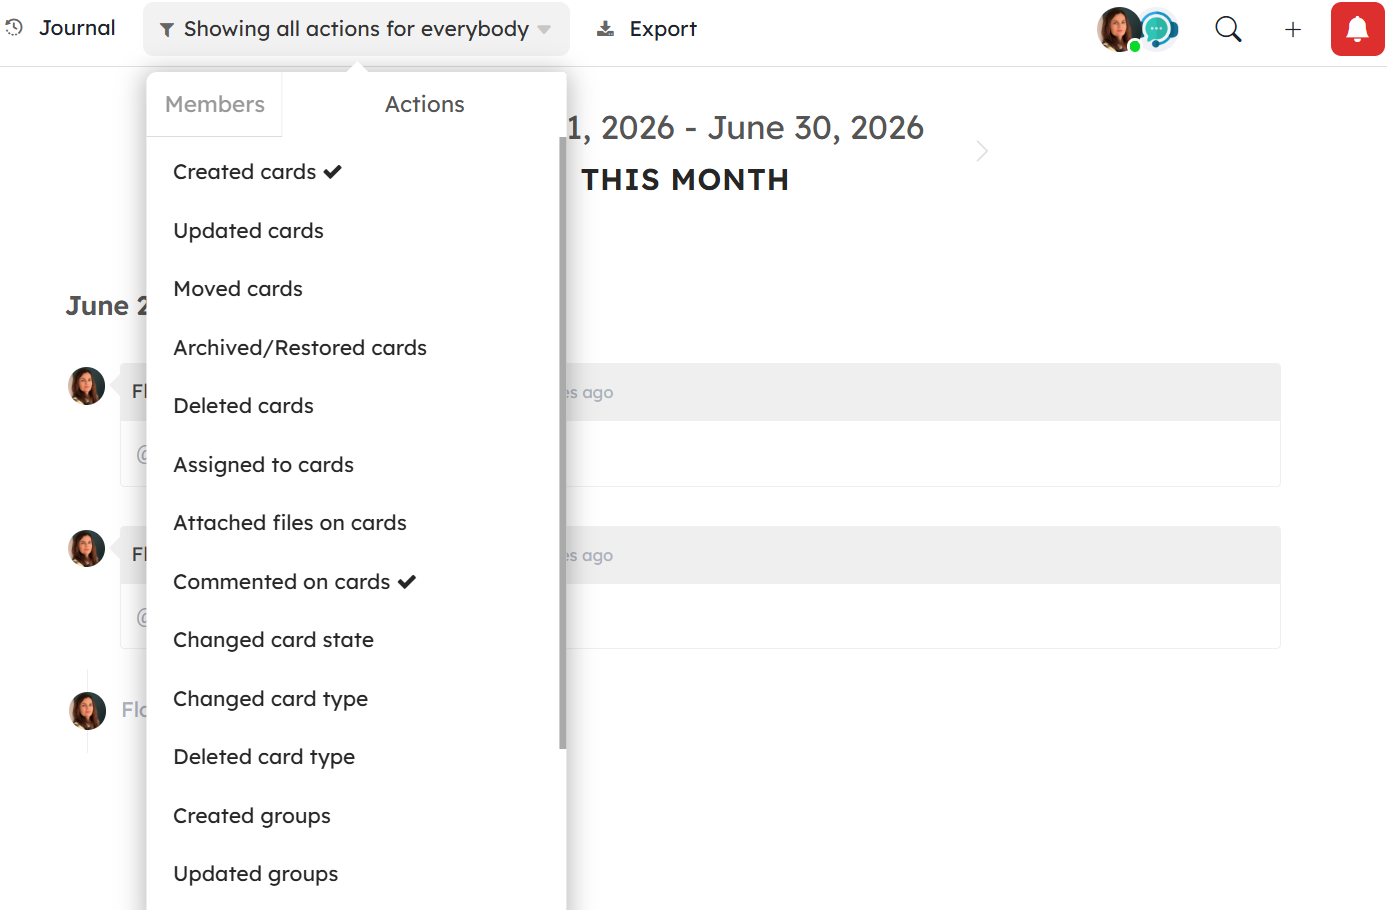
It is the perfect tool for regularly reviewing and synchronizing work with your colleagues.
Logs
You can view an overview of [all logs associated with cards](/help/guides/logs#adding-logs-to-your-cards), with filtering options by log type and time period.
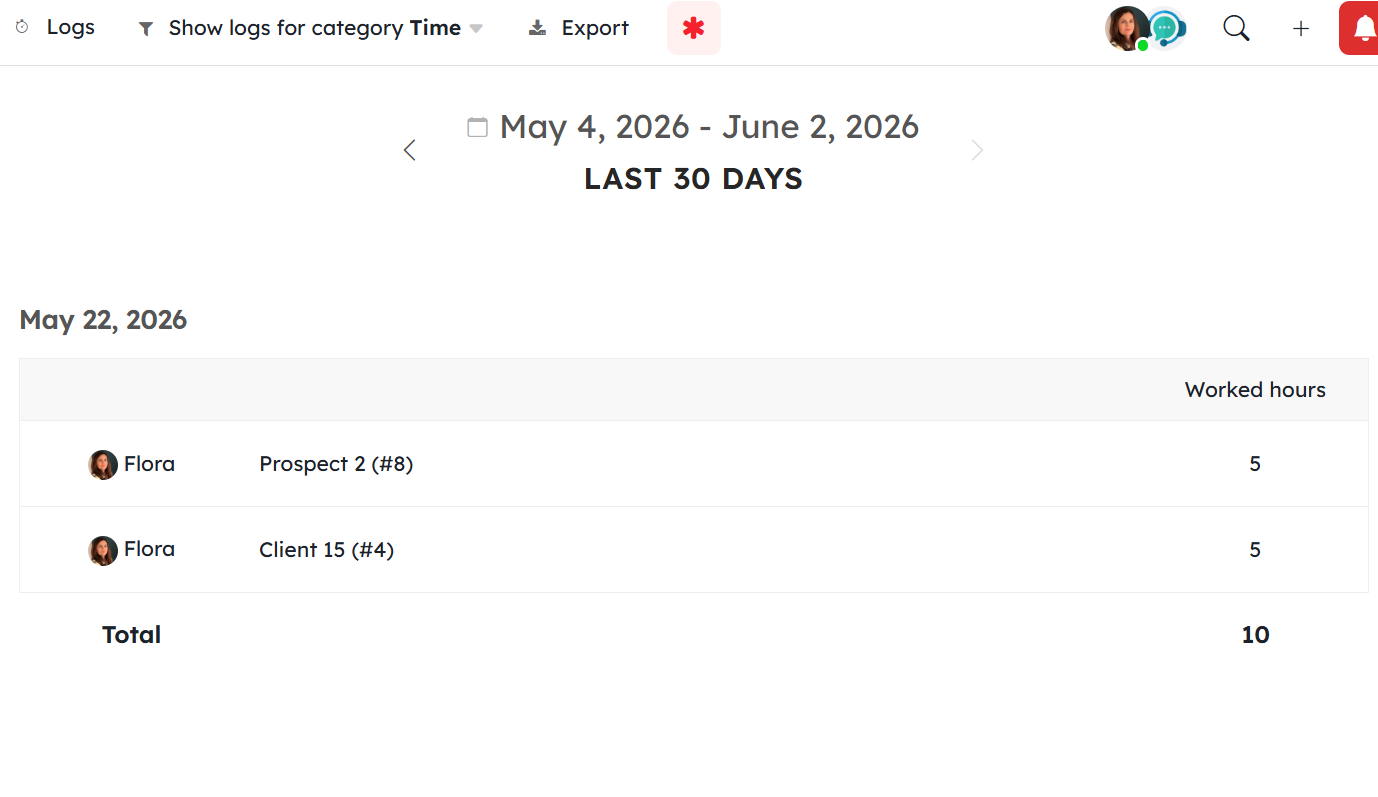
If you want to add a new log type, see [this guide](/help/guides/logs).